At Mindset, we’re big fans of Fiori. As ERP user experience technologies go, it’s the Cadillac to others’ Pintos. But just because we’re fans doesn’t mean we can’t do other things! We’re not interested in one-trick-ponyhood. When our customers come to us for UX solutions, we bring a full suite of technologies to bear. Also, sometimes that means Fiori isn’t the exact fit for a problem.
Enter SAP Screen Personas.
Where Fiori/SAPUI5 come to the table with a new user interface paradigm, Personas takes your existing SAP t-codes and allows you to refine them without losing functionality. Further, if you have a clunky SAP GUI screen, Personas gets the job done without hassle. Additionally, it’s so light on the hassle that a quick example is in order. This example will also feature some custom coding. How could I even bear to call myself a developer if I wasn’t constantly tweaking stuff with code?
- Firstly, start up your Personas environment at http(s)://<your sap web gui system>/sap/bc/personas.
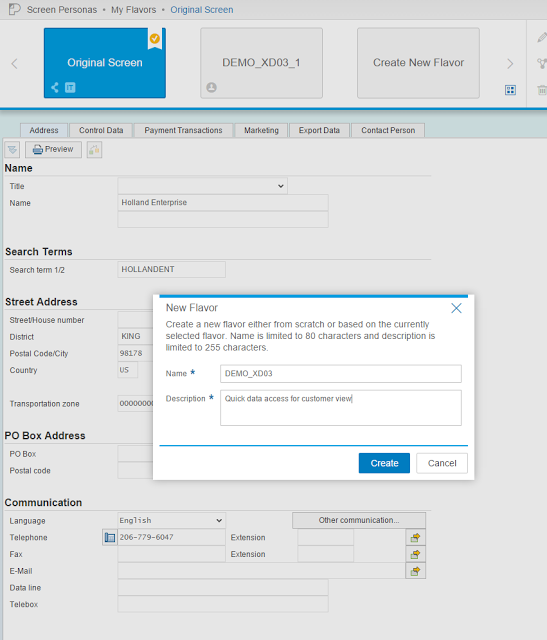
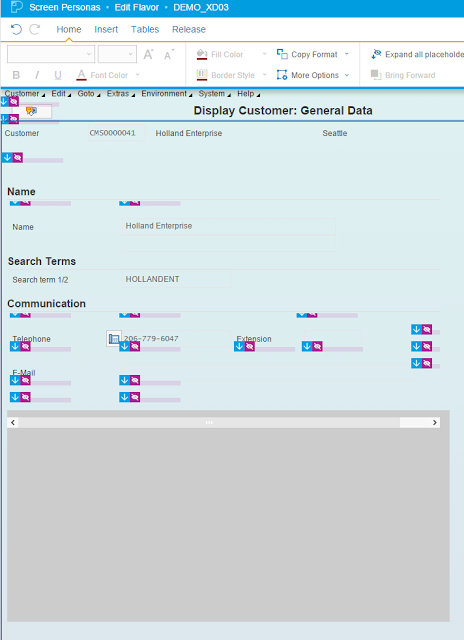
- Secondly, enter the transaction with screen(s) you want to change. In our case, we’ll make an example of XD03 (customer display).
- Thirdly, enter a customer number in the initial screen. We’ll leave that screen alone and focus on the customer detail display.
- When the detail display loads up, find the blue bar at the top of your web screen. If you hover over it, you’ll see the Personas “P” drop down and you can click it. That will take you to the Personas Flavor editor.
- Finally, click on “Create New Flavor”. Enter something descriptive for what you’ll be doing.
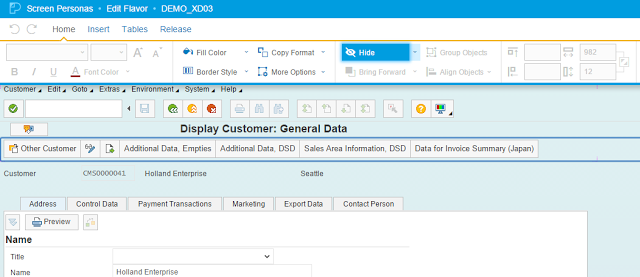
- When you’re in the Flavor editor, you can easily start hiding and rearranging the screen elements. However, for our case of really trimming down the screen, I like to select an entire set of items in a row and choose the “Hide” button.
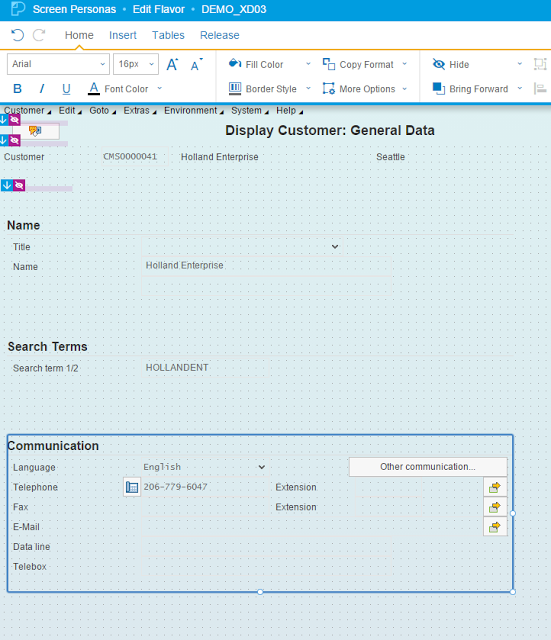
- You can also rearrange stuff that’s in the screen tabs. I wanted to create a very simple customer info screen, so I looked at only the address pane. Additionally, you can grab sections of the control and move them out of the tab section. Further, see here how I moved them to the right side.
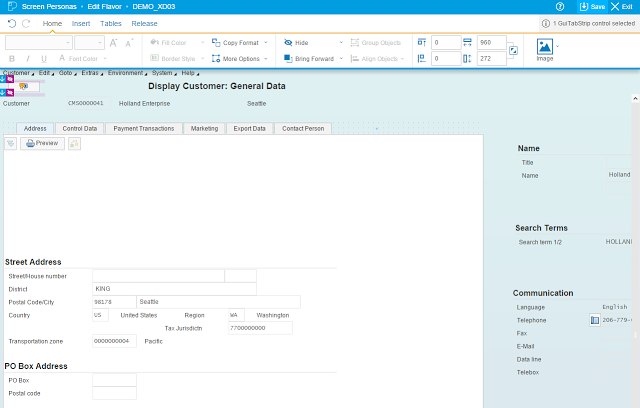
- So I hid the entire tab area on the left and then moved the elements I pulled out back over to the left. However, note that it’s very easy to use the numeric position indicators in the main menu to the right of the “Group Objects” and “Align Objects” buttons.
- When you’ve hidden and arranged everything you want, you can add an HtmlViewer control to the screen as well. Use the “Insert” menu and choose HtmlViewer. I positioned it right below our set of controls that we rearranged. It’s the big gray area under the scroll bar:
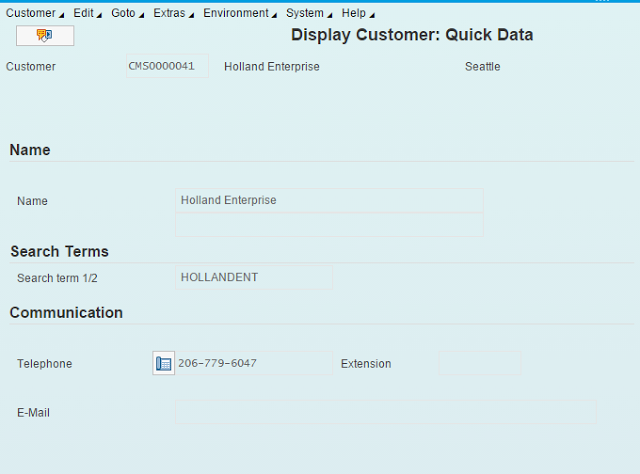
- I also changed the description of the application, just so users would know they’re using the pared-down version of the screen. Double-click on the title bar and you can enter another description. This one went from “Display Customer: General Data” to “Display Customer: Quick Data”.
- Trying out the screen real quick before I add my custom code. Note the huge reduction in active screen fields. The HtmlViewer is not visible because there’s nothing in it yet – that’s what we’ll be adding.
- Cool – our screen is very slimmed-down. Let’s add some context information to it – stuff that isn’t even there in the original SAP screen. I want to see the last ten orders that this customer put in to my company.
- First step is create an RFC-enabled function module. For our demo purposes it’s a super-easy FM – select the latest 10 orders for this customer. Yeah, I know there’s no error handling or anything. It’s a demo, people!
- Make sure it’s RFC-enabled and activate it.
- Back in Personas, navigate back to the Flavor and open the “Scripting” menu. Right side of this picture:

- Personas comes with a cool API that’s exposed in javascript: you can call RFC functions through it. The scripting interface also lets you know which screen elements you’re going to be controlling and easily adds them to the script. Further, click on the little mouse pointer on top of the square icon on the right hand side of the screen to be able to click on a screen element and add it to your code.
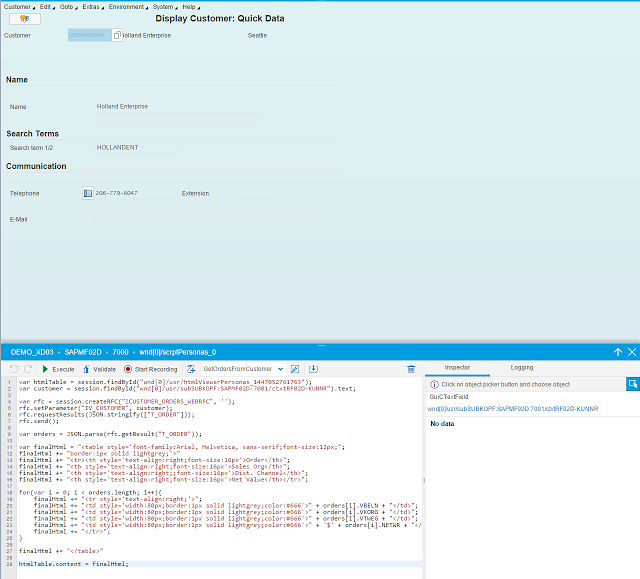
- I mentioned that we’ll be using the HtmlViewer object to display our RFC data. See the below listing for how to do that in a basic way. Note that I’m calling the RFC, getting the results, building an html string, and adding that raw html to the HtmlViewer object.
- However, please note that you can use the “Execute” button to test out your script. Further, if you’ve done things correctly, when you press it you’ll see the information pop up in the screen.


