This blog is the second part of a series of four blogs to introduce FIORI tools. For Part 1, start HERE.
In this blog, we will focus on the guided development feature of FIORI Tools.
Guided development, the big picture
Before we get into the specifics, let us figure out the rationale behind SAP coming up with guided development feature. For FIORI Elements apps, we are aware that there is some scope of customization. E.g., adding custom actions to list reports, setting table type, configuring list report/object page features, configuring card properties etc.
In order to implement these enhancements, we can either memorize the annotations and configurations, or we can refer to the SAP documentation (reference link below) to see the syntax and then copy- paste it at the right location. This is time consuming!
Reference-
https://sapui5.hana.ondemand.com/sdk/#/topic/7f844f1021cd4791b8f7408eac7c1cec
I always wondered if SAP would provide a wizard-based solution which will allow developers to choose what needs to be done and then also insert the code snippet at the desired location.
As an example, a developer might want to add a new column to the list report table. Wouldn’t it be awesome if the wizard within FIORI tools allows us to choose an option to add a new column? The wizard should then ask information like the entity type and property related to the column to be added. Furthermore, it should also insert the code snippet at the right place, in this case local annotation file.
Trust me, SAP is listening to developers and customers!
This is exactly what guided development does.
Examples
We will continue with the list report page app that we configured in the first blog.
Let’s revisit the architecture of FIORI elements app –
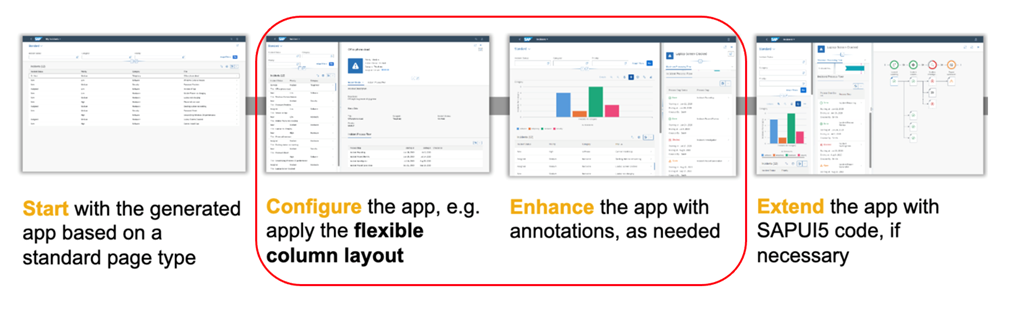
We will explore steps 2 and 3 and will see how guided development will help us to configure and enhance the apps.
For list Report page – We will work on below three enhancements using guided development
Prerequisites – All steps in blog 1 are completed
https://mindsetstg.wpengine.com/introduction-to-fiori-tools-part-1/
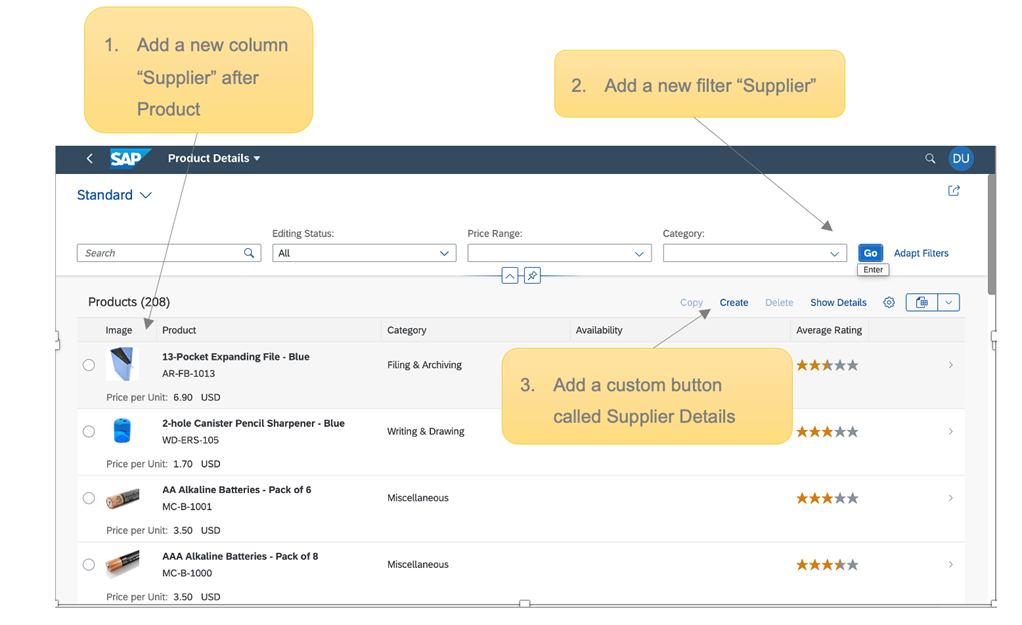
Example 1 – Add a new column “Supplier” before Products column
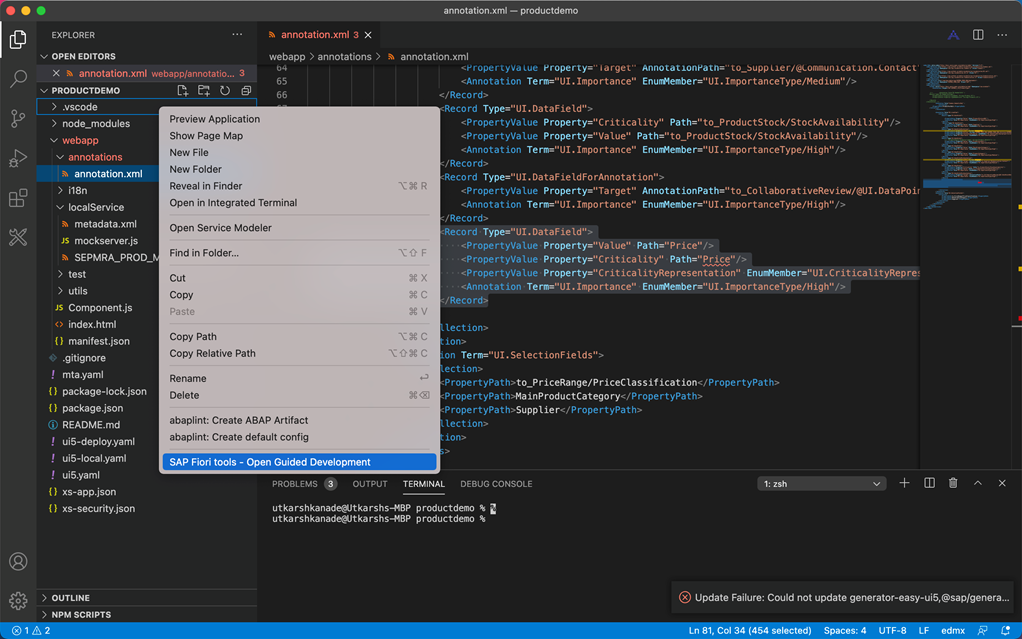
Step 1- Open the guided development
Option 1 is to right click on any node below the Project node and select Open guided development tool as shown below
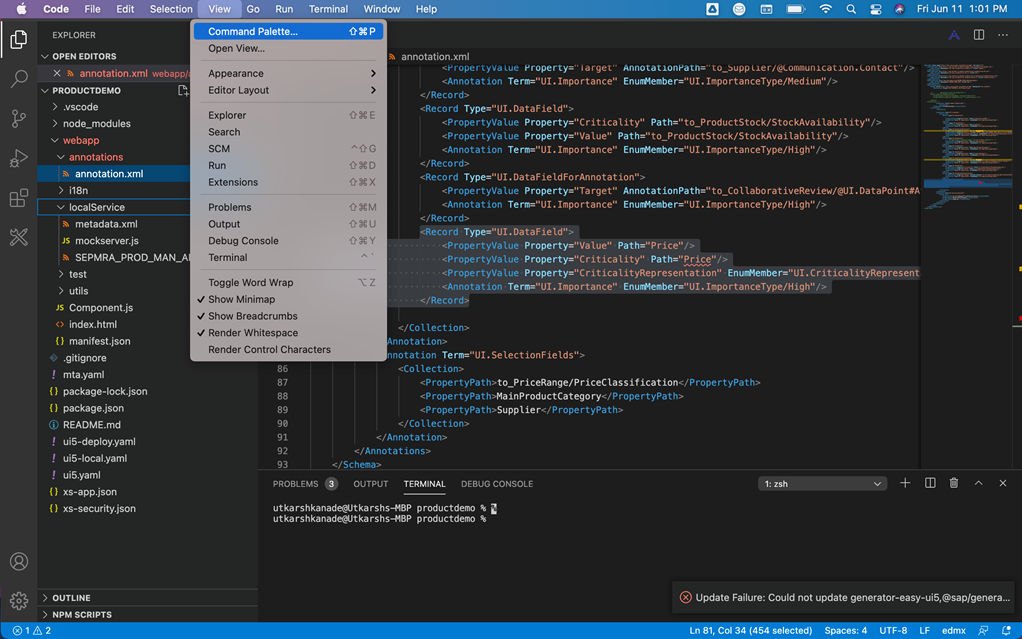
Option 2 – Go to the command pallet and type Fiori: Open Guided Development
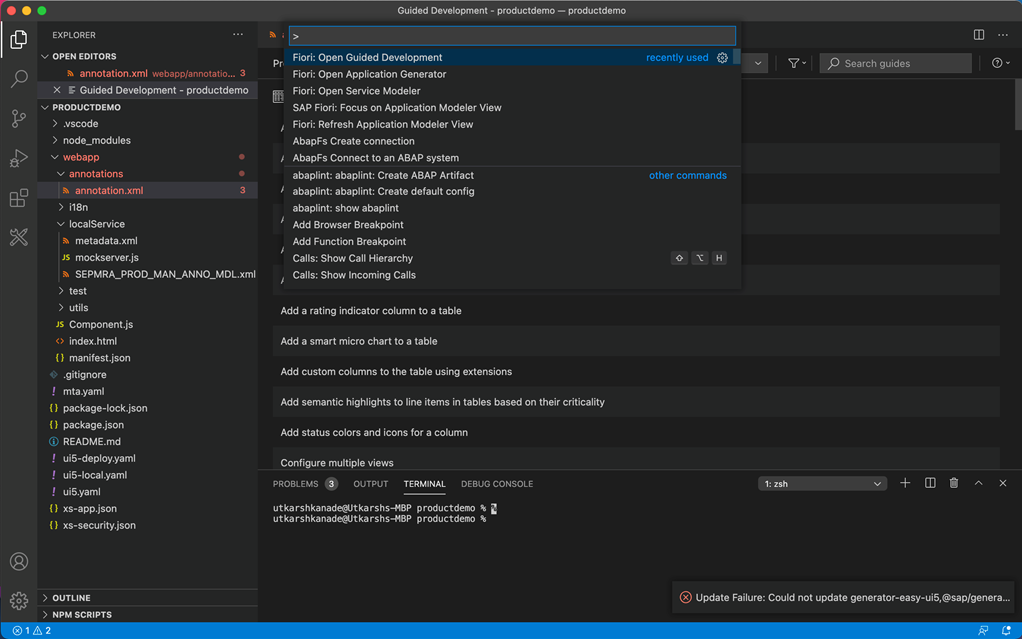
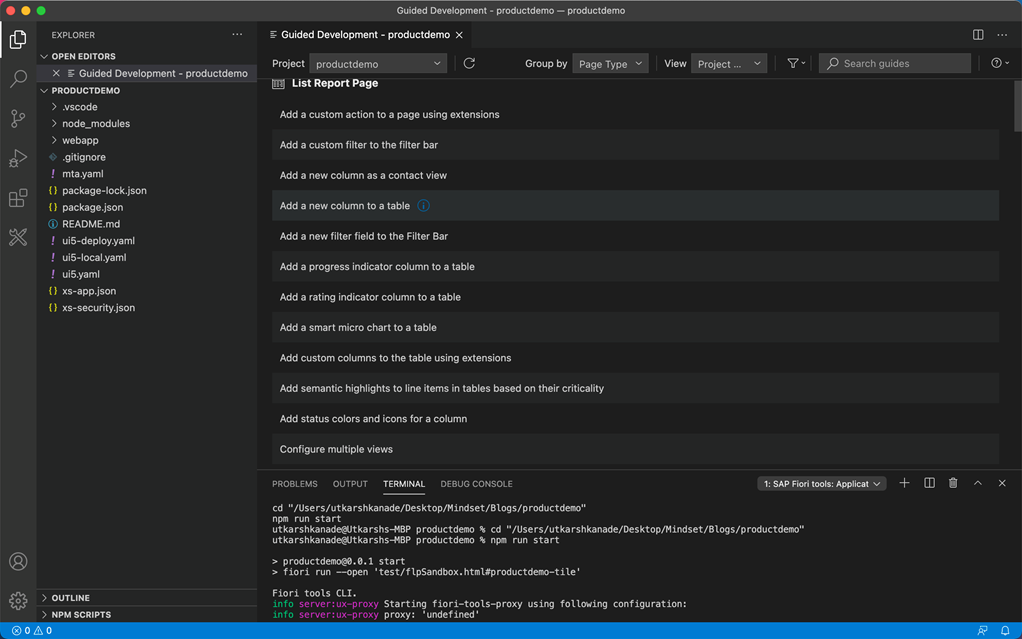
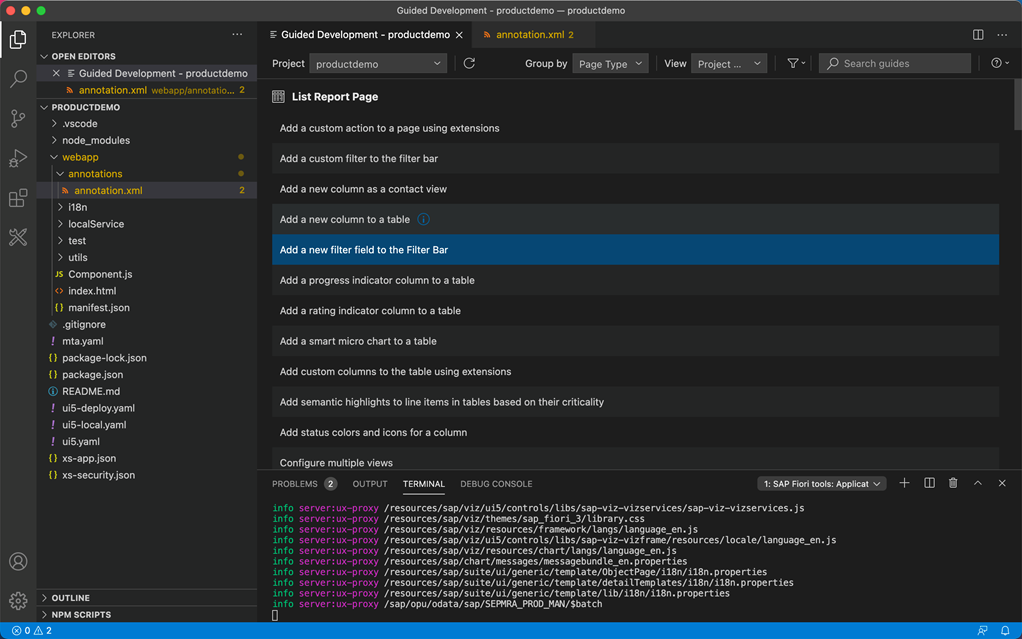
We should see the below screen-
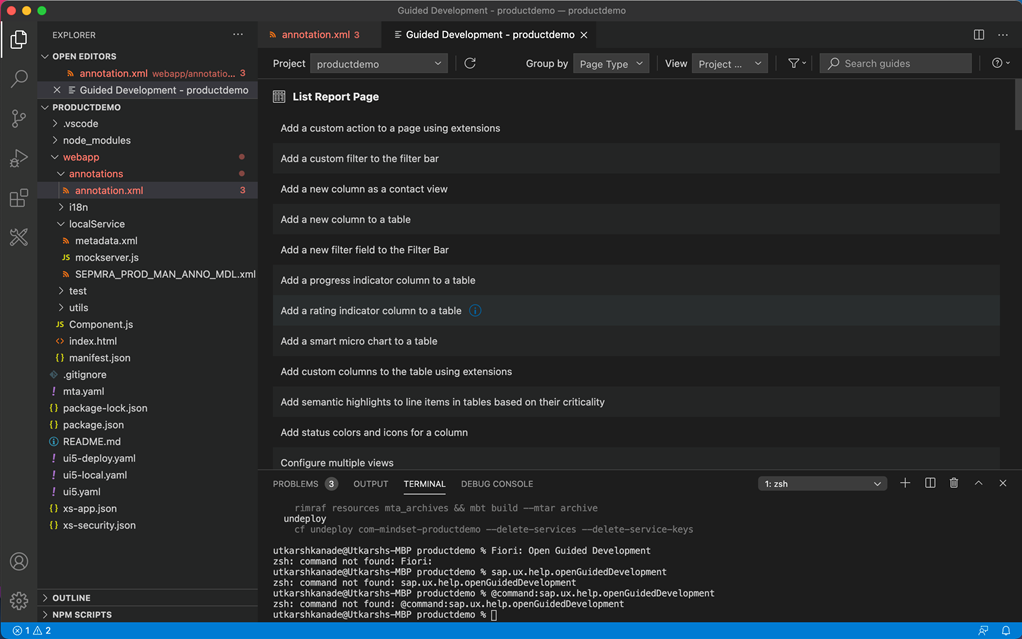
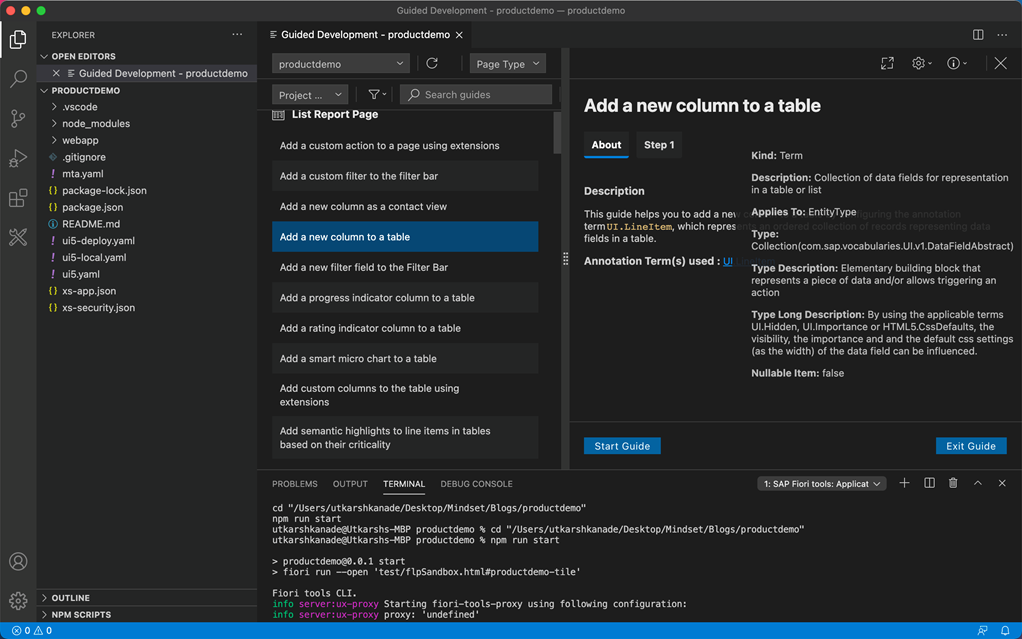
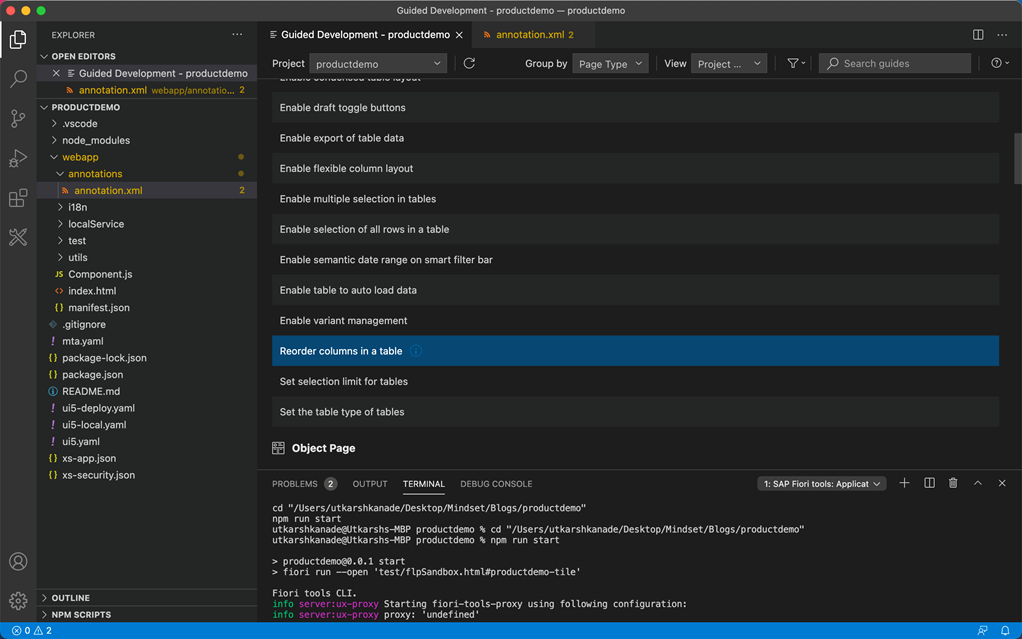
Step 2 – Select “Add a new column to a table option”.
Tip – If you cannot spot it, search it using the search option in the tool bar –

Also pay attention to the options like Group by and View which provide different perspectives of viewing the guided development options. They are extremely useful!
Step 3:
Follow the guide by clicking on Start Guide.
Step 4:
Provide the Entity Type “SEPMRA_C_PD_ProductType” and Property “Supplier”
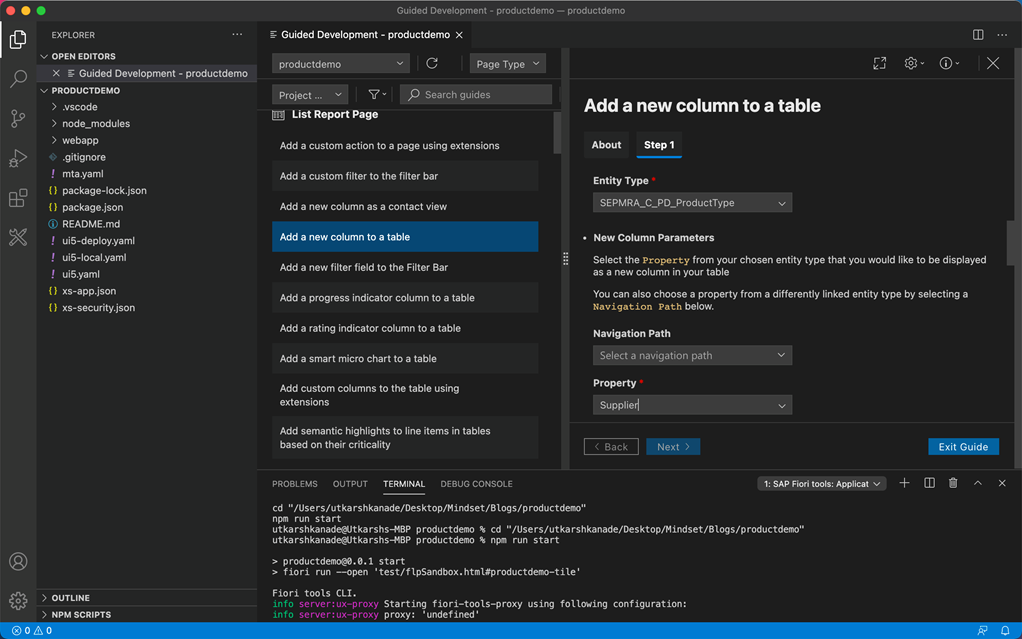
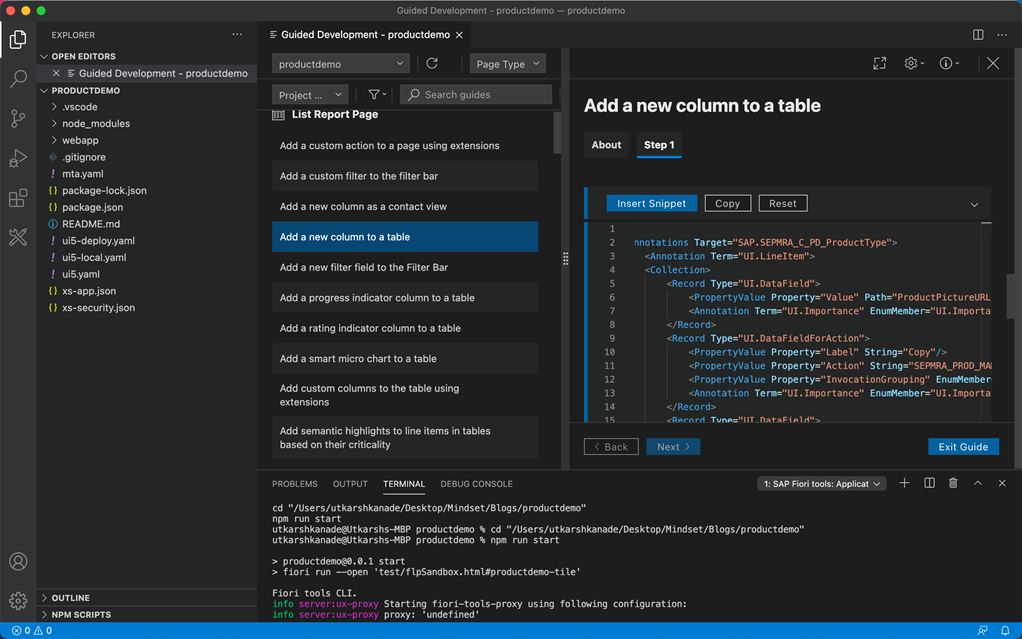
Step 5:
Please observer the code auto generated by the wizard. Now click on the “Insert Snippet” button
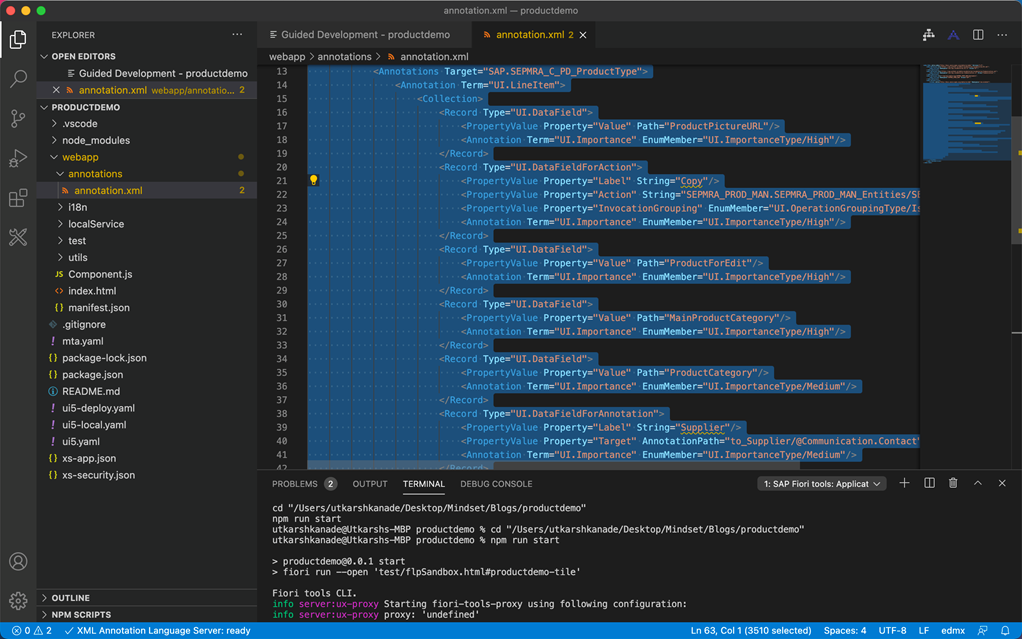
Step 6:
Check the inserted code in annotation.xml file. This is the local annotation file and from hereon, these annotations will be given preference over the annotations defined for line items in CDS view
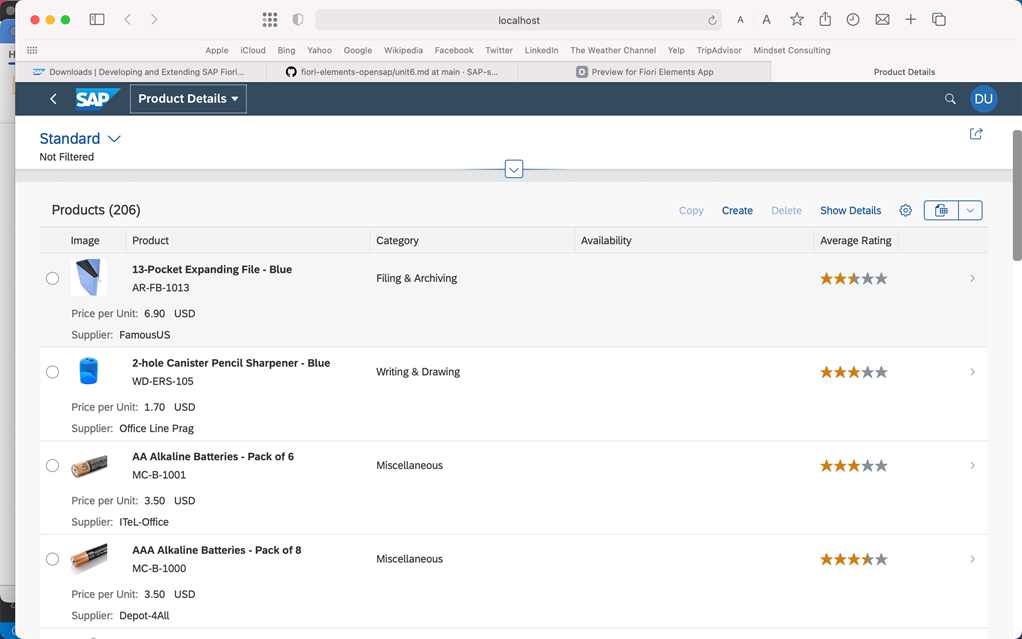
Step 7:
Check the output. Supplier field appears at the end, which is great, but we want it to appear before Product column. So, in the next step let us reorder it using the guided development.
Step 8:
First, select “Reorder columns in a table” from the list of options.
Step 9:
Secondly, start the guide by clicking on “Start Guide”
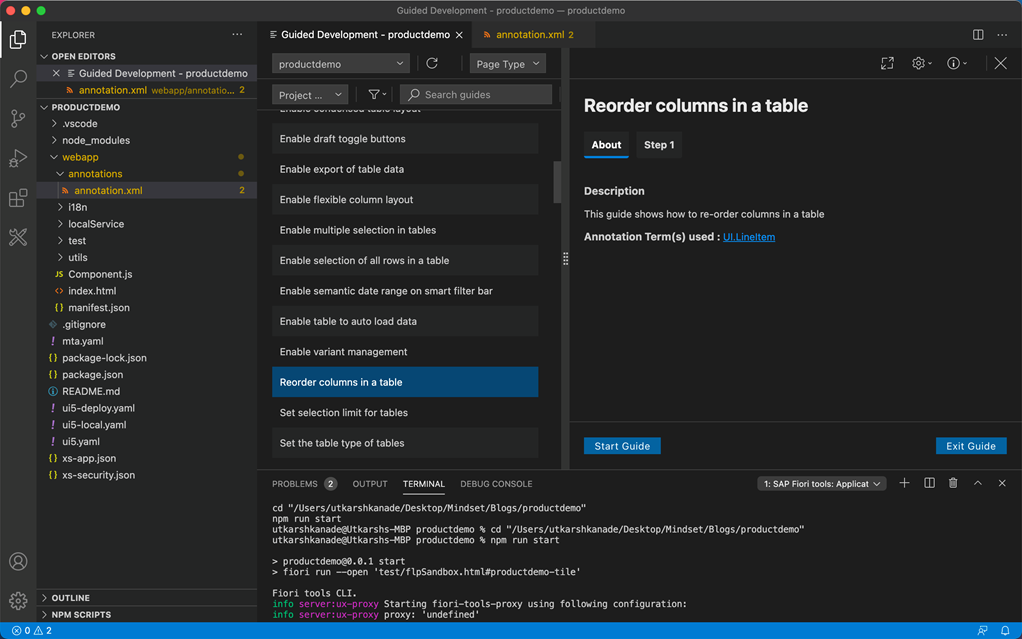
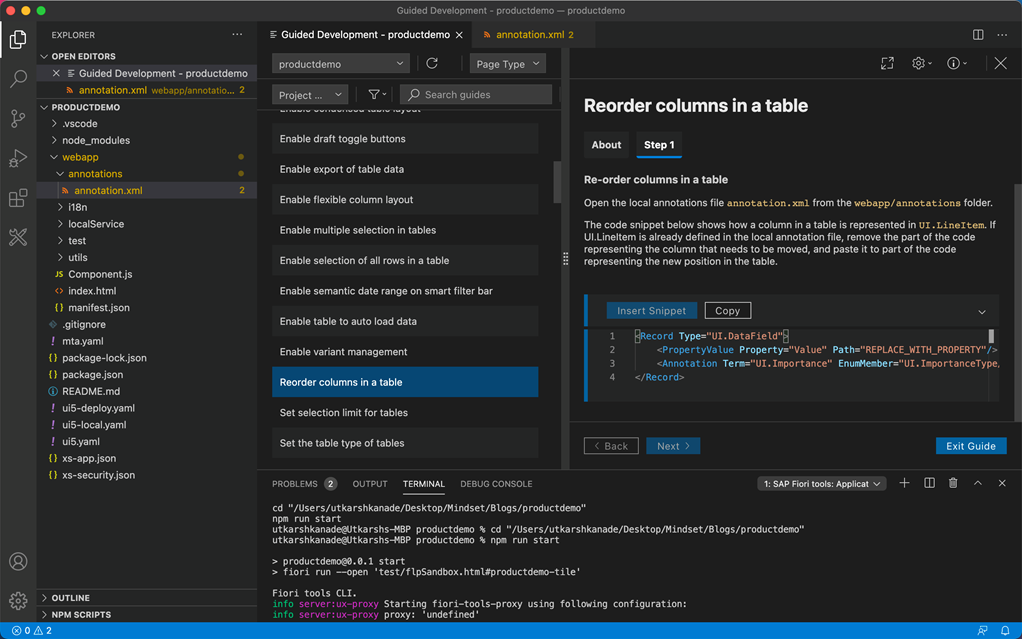
Step 10:
The guide clearly explains that the annotation “UI.LineItem” from annotation.xml is to be amended. We need to copy the record for Supplier and paste it before the record for Products
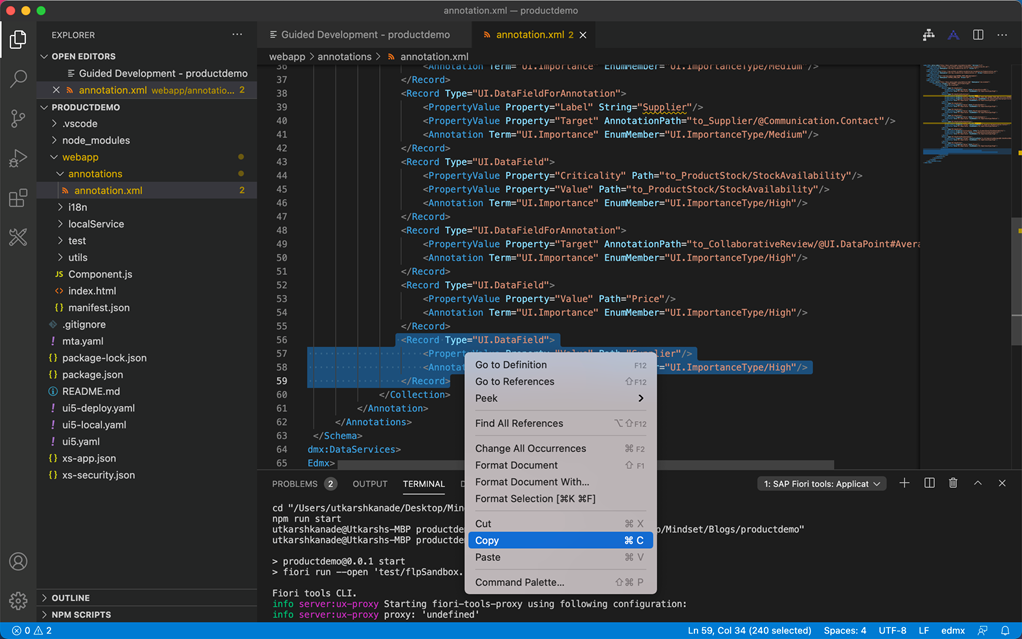
Step 11:
Go to the annotation.xml file and copy the record for supplier and paste it before the Product record
Step 12:
Test the output. Supplier appears before Product
Example 2 – Add a new filter “Supplier”
Step 1 – Select the option “Add a new filter field to the Filter Bar”
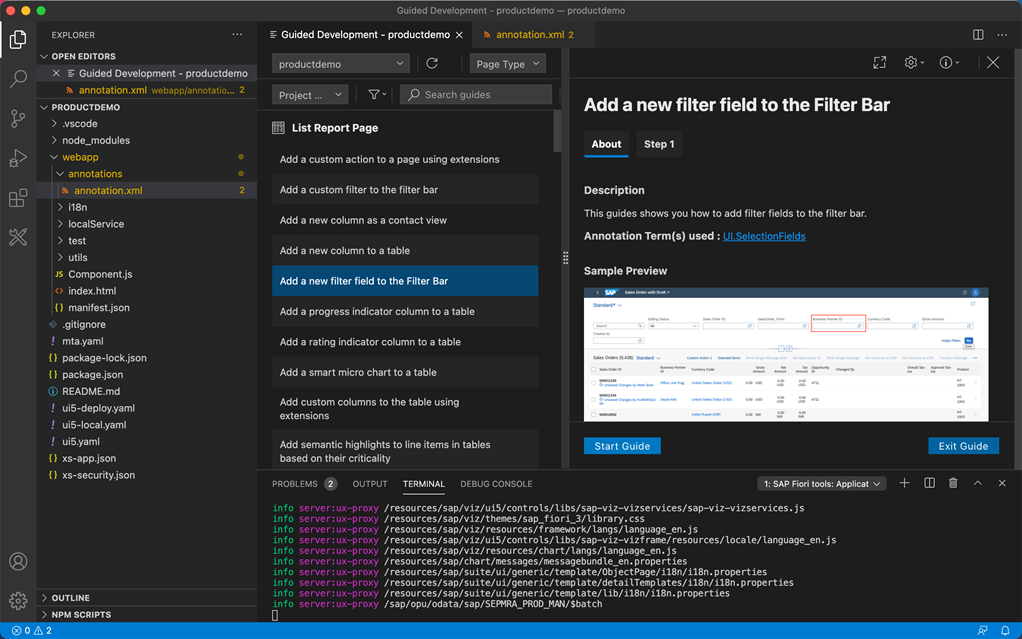
Step 2 – Click on Start Guide. Observe how the Sample Preview shows where the filter is added.
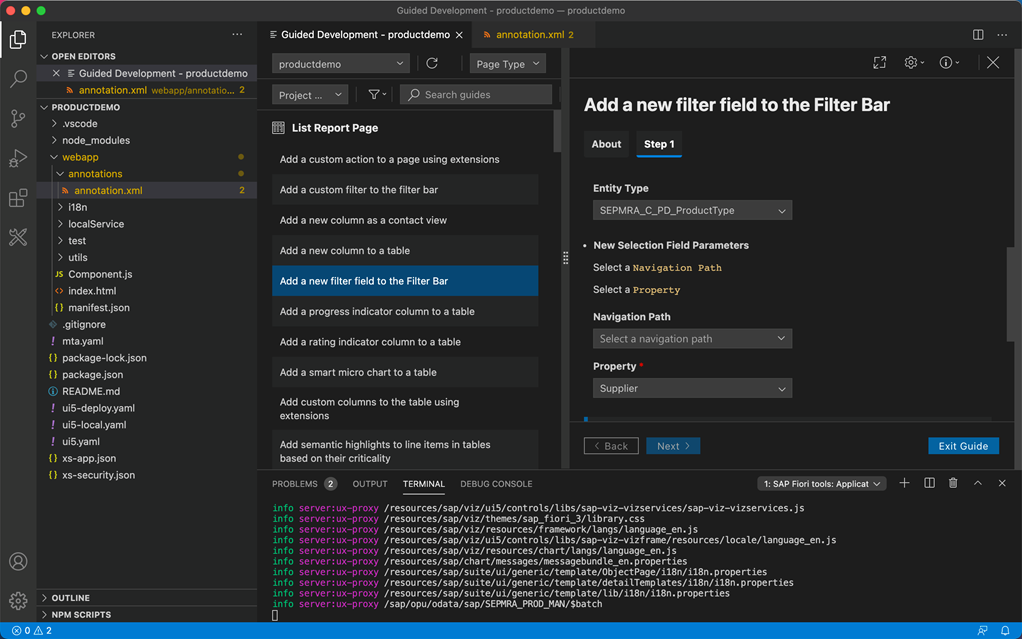
Step 3 – Select the Entity type “SEPMRA_C_PD_ProductType” and property “Supplier”
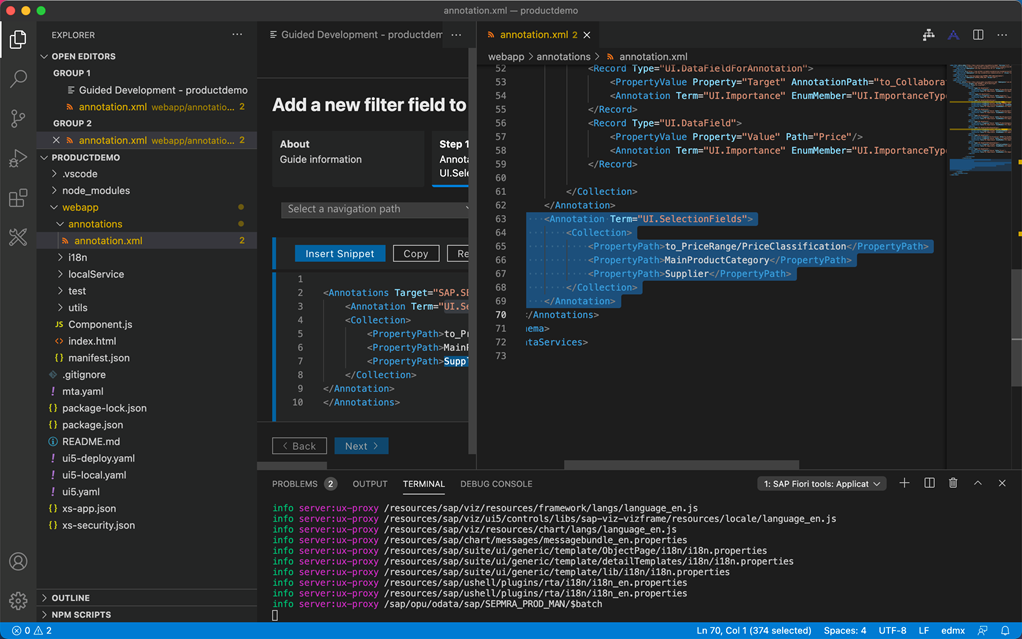
Step 4 – Insert the code snippet auto generated by the guided development by clicking on “Insert Snippet”
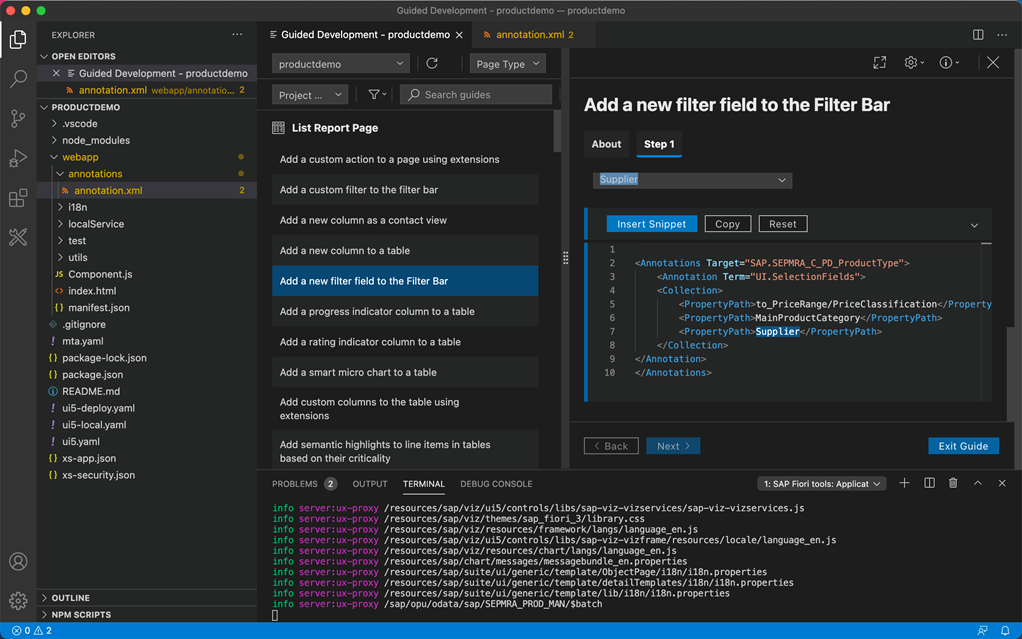
Observe that the code snippet was added to the annotation.xml file automatically
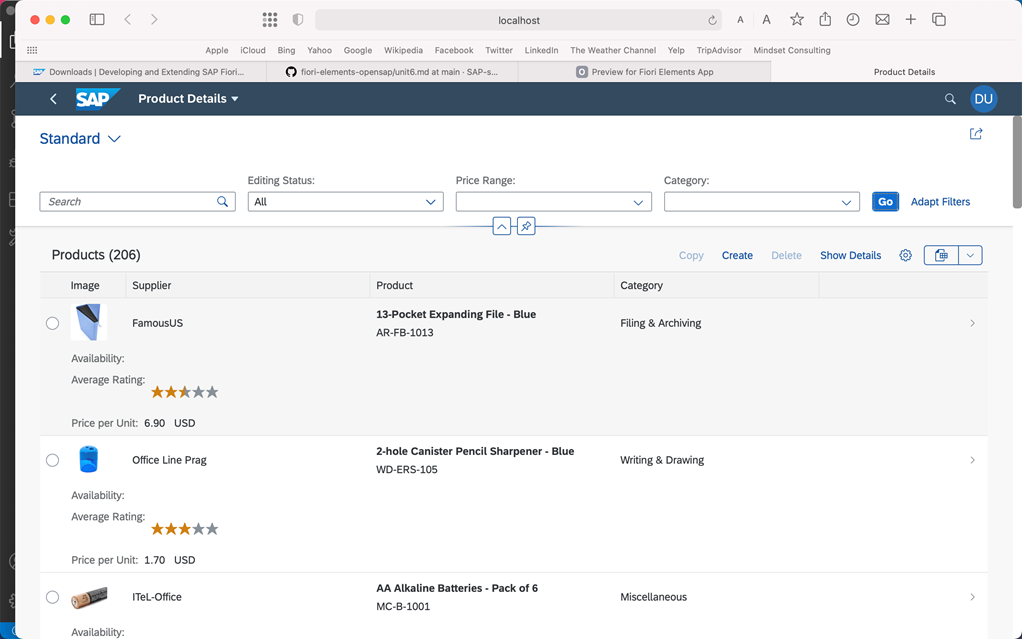
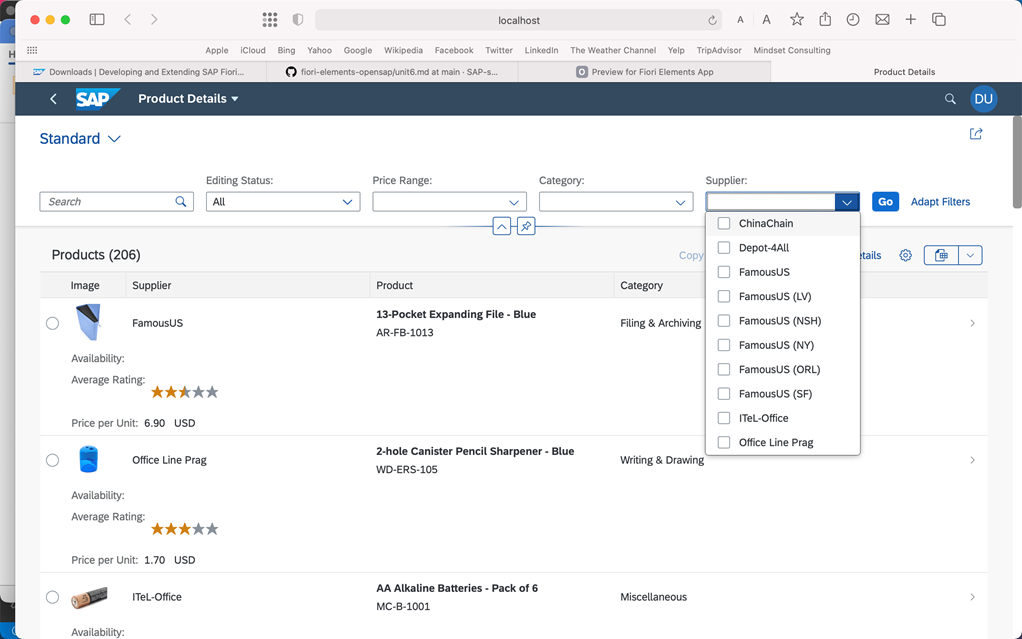
Step 5 – Test the output
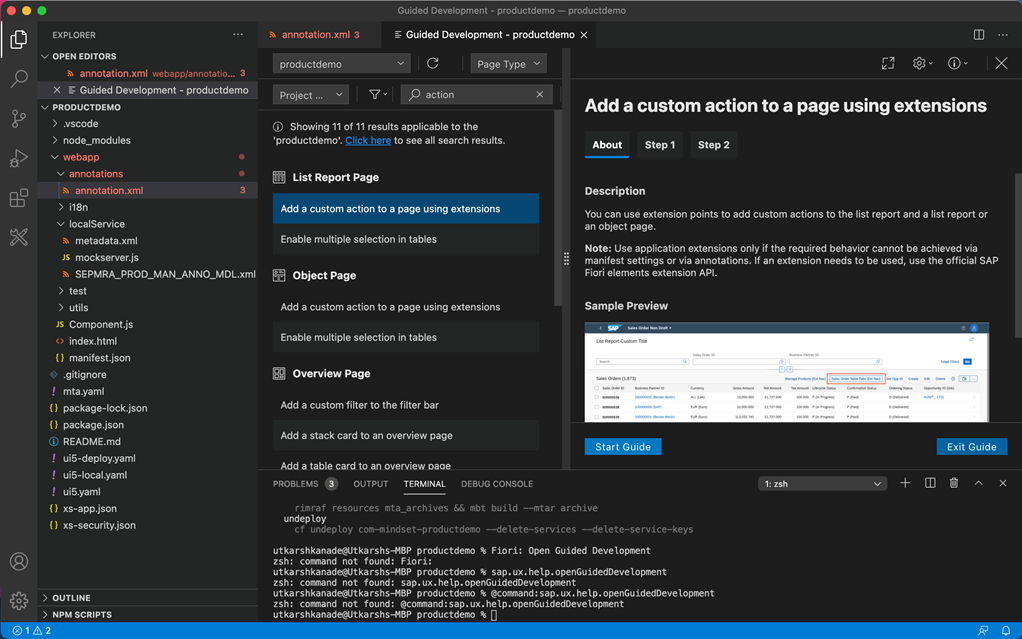
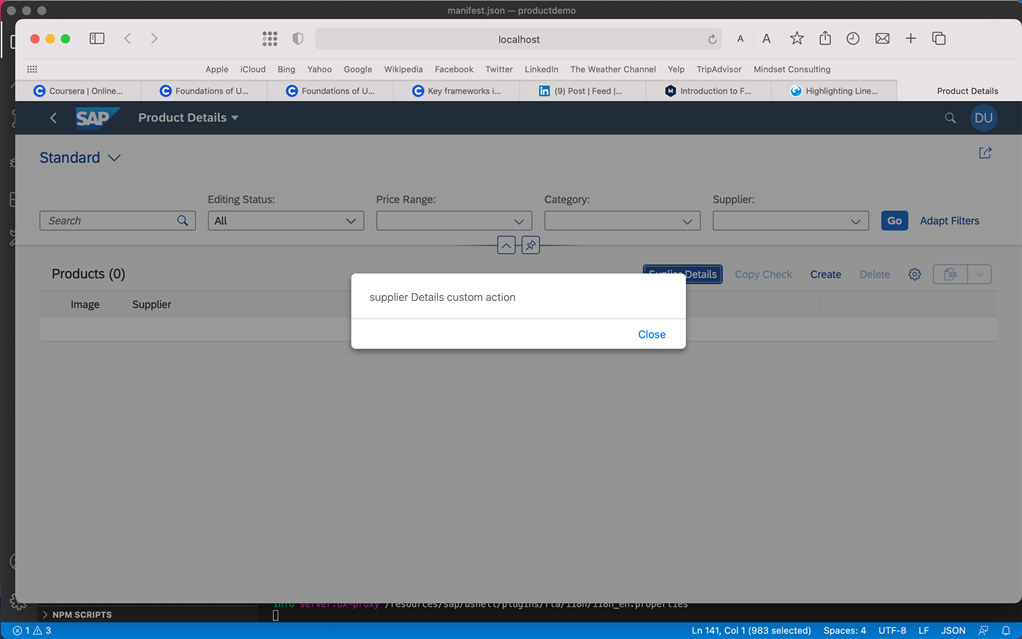
Example 3 – Add a custom action called “Supplier Details”
Step 1 – Select “Add a custom action to a page” and then click on the start guide button
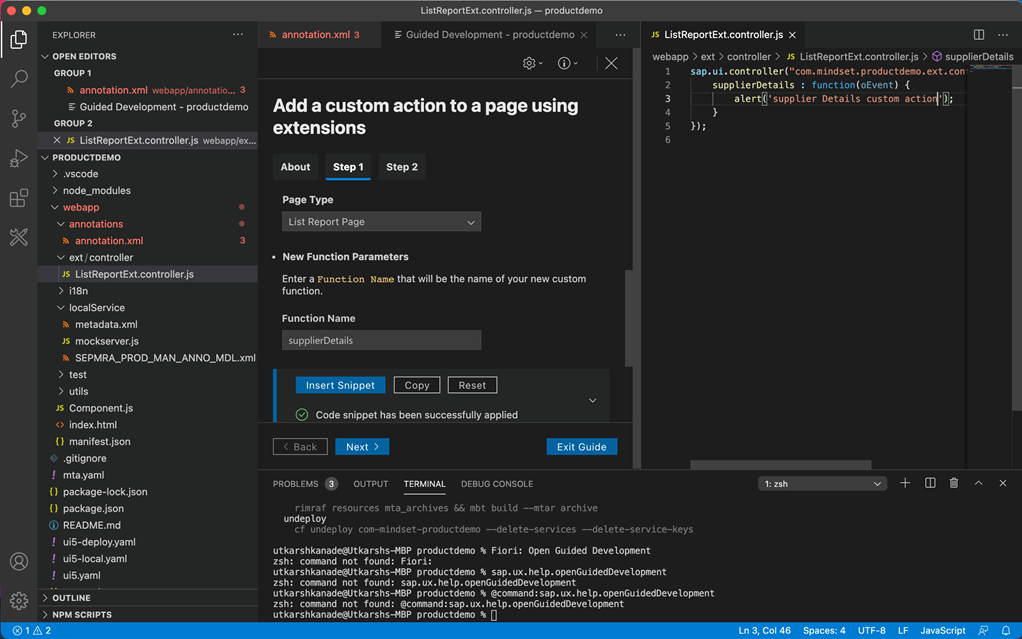
Step 2 – Select the Page type as “List Report Page” and the Function name of your choice, e.g. “supplierDetails”. Now click on “Insert Snippet”
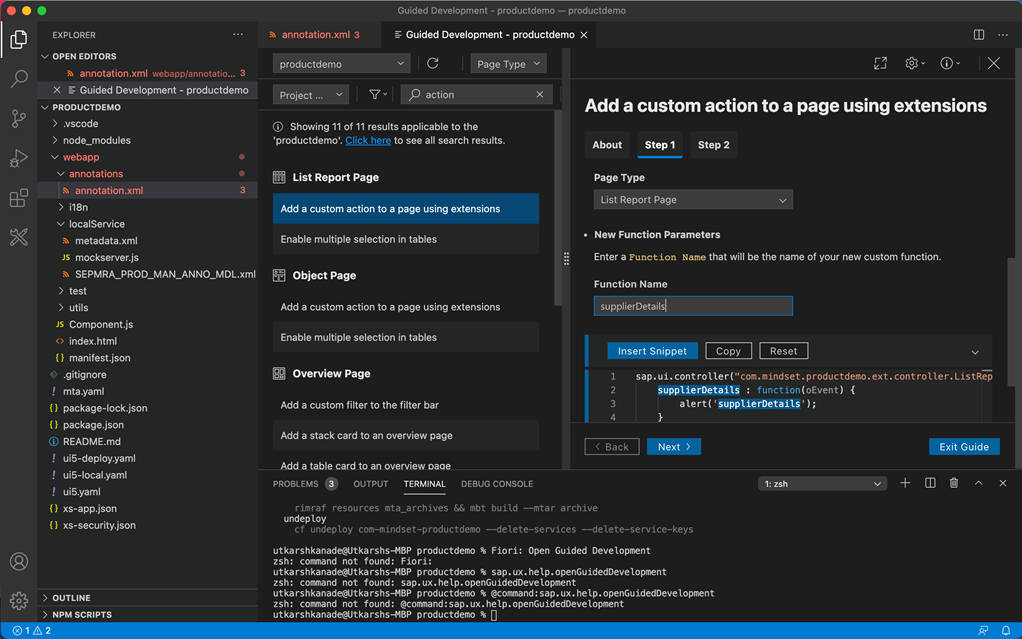
Step 3 – Observe the new controller automatically created and also observe the code generated in the controller
Step 4 – Click on “Next” to go to Step 2 of guide. Here, provide the entity set which is “SEPMRA_C_PD_Product” in our case. Also provide the below details –
Action ID – suppplierDetails
Button Text – Supplier Details
Row Selection – No
Observe the auto generated code snippet –
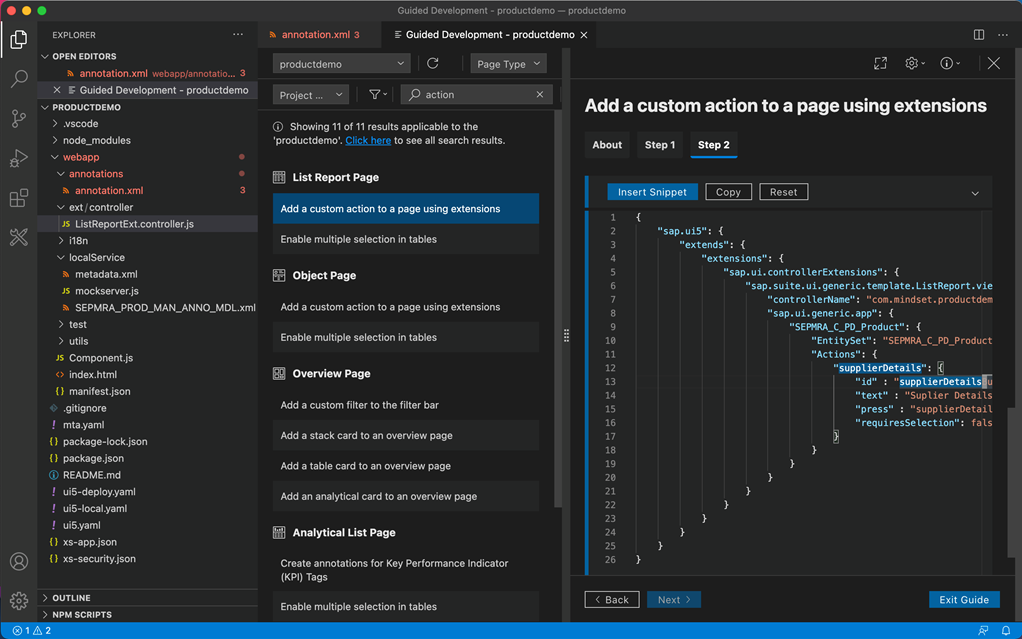
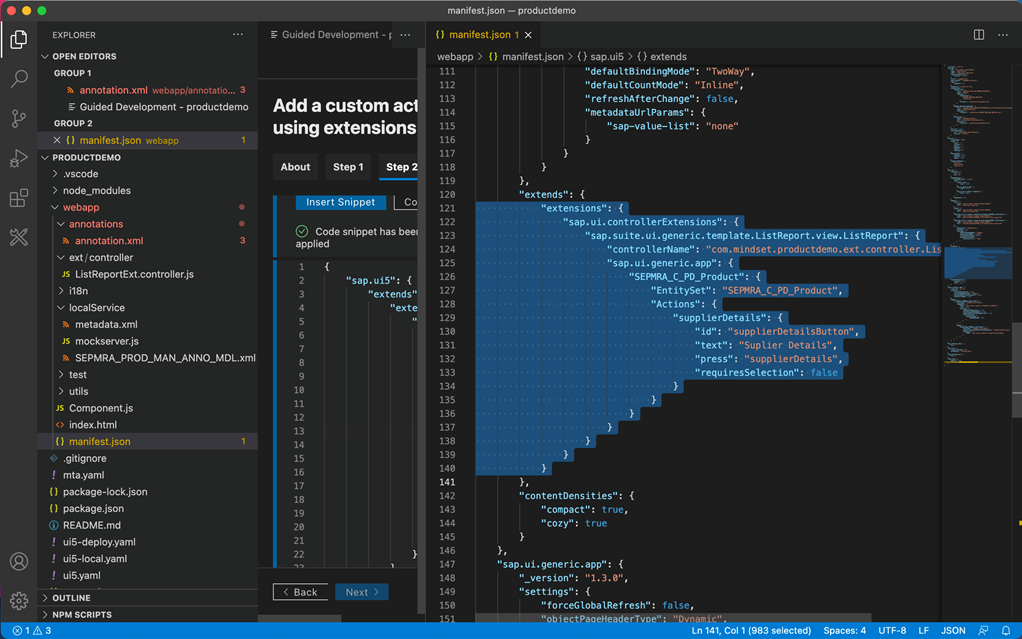
Click on “Insert Snippet”
Once done, observer the changes highlighted in manifest.json file
Step 5 – Test the application to see the new action
Congratulations! Completed! What next?
Coming soon: Part 3 – Exploring the service modeler

