In my previous blog, I introduced you to the SAP Launchpad service, a repository of innovative solutions and applications for your organization. In short, the innovation of this service lies in its simplicity. Subsequently, it allows you to choose a solution and customize it specifically to meet your organizational needs with ease.
In my blog today, I will take you through the processes involved in creating your own Launchpad site.
How to create your SAP Launchpad site?
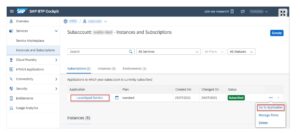
- Firstly, locate the Launchpad Service under ‘Subscriptions’ and choose ‘Go to Application’.
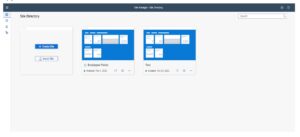
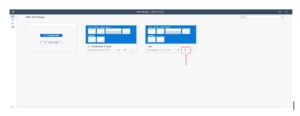
- Secondly, choose ‘Site Directory’. Then ‘Create Site’.Here, I have created a site named ‘Test’. This site will be the central point of all your applications..
How to Add your Apps to the Launchpad Service
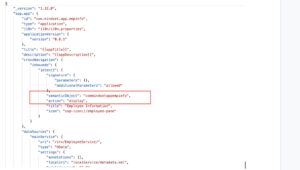
- Firstly, in order to add new apps to your Launchpad Service, you will need to add the navigation target of your apps in the manifest.json file of the SAP UI5 application. Here, I have an application for employee information. I will now add it to my Launchpad site.
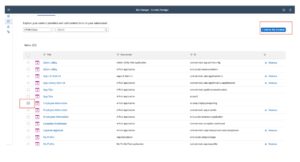
- Secondly, choose ‘Provider Manager’ on the left and refresh the HTML5 apps entry there.

- Choose ‘Content Manager’ followed by ‘Content Explorer’ and open the content provider HTML5 apps.
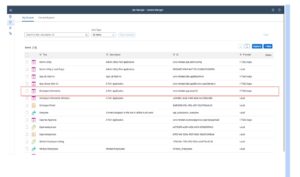
- Add your application to ‘My Content’.
- Finally, choose ‘Content Manager’ followed by ‘My Content’. Subsequently, you will now be able to see your application on an items list. This means you have successfully added your application to the content. To make it visible on the Launchpad Service, you will now need to create roles, groups, and catalogs, and assign them to the user.
How to create Roles, Groups, and Catalogs for your Launchpad?
-
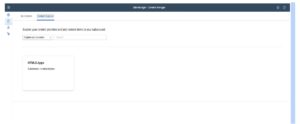
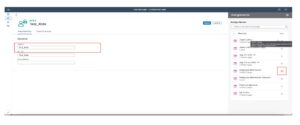
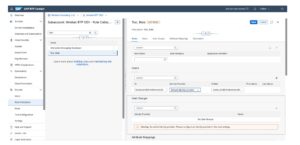
- Firstly, click on the ‘New’ button on the top right corner and choose ‘Role’.
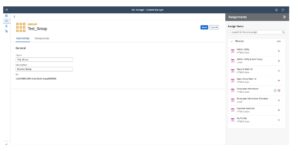
- Secondly, Enter the role name like in the example below. Here, I have used ‘Test_role’.
- Assign the application name ‘Employee Information’ to your roles and click on ‘Save’.
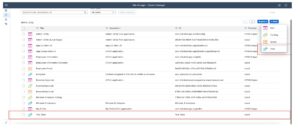
- Navigate back to the content page and create groups. Assign your app to that particular group ‘Test_Group’.
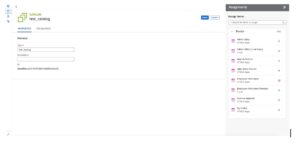
- Similarly, you can create a catalog for your apps as well
Assign Roles to the Launchpad Service site.
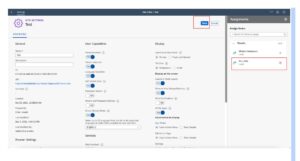
- Navigate back to the site directory page and click on the ‘Settings’ button of your Launchpad Service site.
- Click on the ‘edit’ button. Assign your ‘test_role’ to this site and click on ‘Save’
Assign Role Collection to the User
- Firstly, Log into the BTP Sub-account.
- Secondly, Go to ‘Security’
- Click on ‘Role Collections’.
- Search for ‘Test_Role’ in the search bar.

- Navigate to ‘Test_role’ and click on the ‘Edit’ button at the top.
- Now, under the ‘users’ tab, add your ID and Email ID.
- Click on ‘Save’.
- Finally, once done, you will be able to see your apps on your Launchpad Service site.
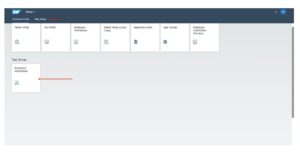 In conclusion, you will now be able to cover all areas of launchpad service and you can create one for your organization with ease.