I’ve noticed in search results and forum posts that there are still a lot of questions about how to build out your Fiori Launchpad. Gavin Quinn did a great blog when SAP Fiori was just introduced on setting up your FLP (found here). If you have an on-premise landscape and are hosting your FLP in Gateway, please check that blog out for any questions along the way.
I did a Webinar recently on setting up your Fiori Launchpad in the cloud and wanted to also post the step by step process I went through to set it up for anyone that missed it live. To follow along with this blog you’ll need:
- An SCP trial account (or productive account with the Portal service)
- An app hosted in SCP (can be easily ported from an on-prem system if needed)
- 15-30 minutes of time
- That’s it!
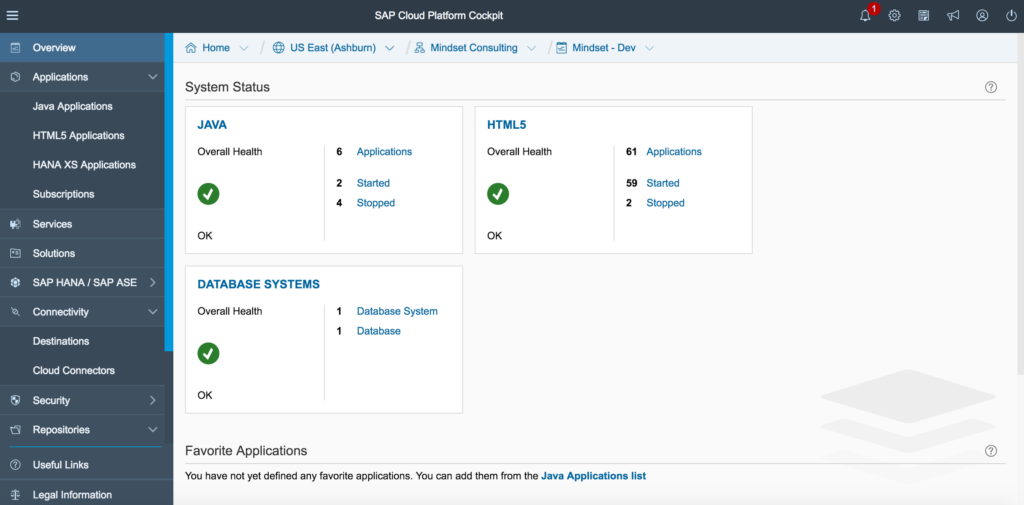
To start, log into your SAP Cloud Platform account. Once logged in you see your dashboard and links on the left.
Click on Services on the left hand navigation pane and scroll down until you see the Portal service.
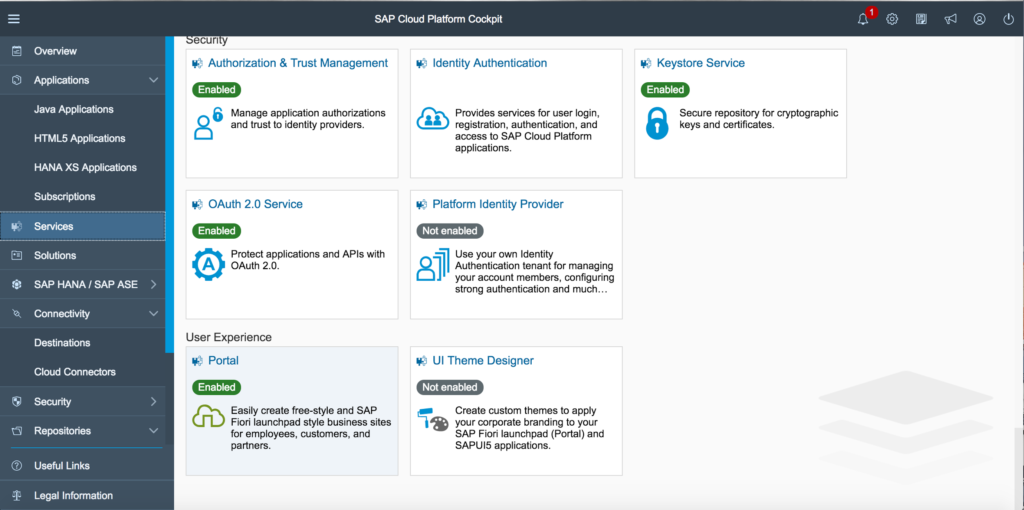
When clicking on the Portal service you are taken to the service’s page where you can enable the service if it is “not enabled” and/or choose to Go to the Service. Our service is enabled so I can click on the link “Go To Service”

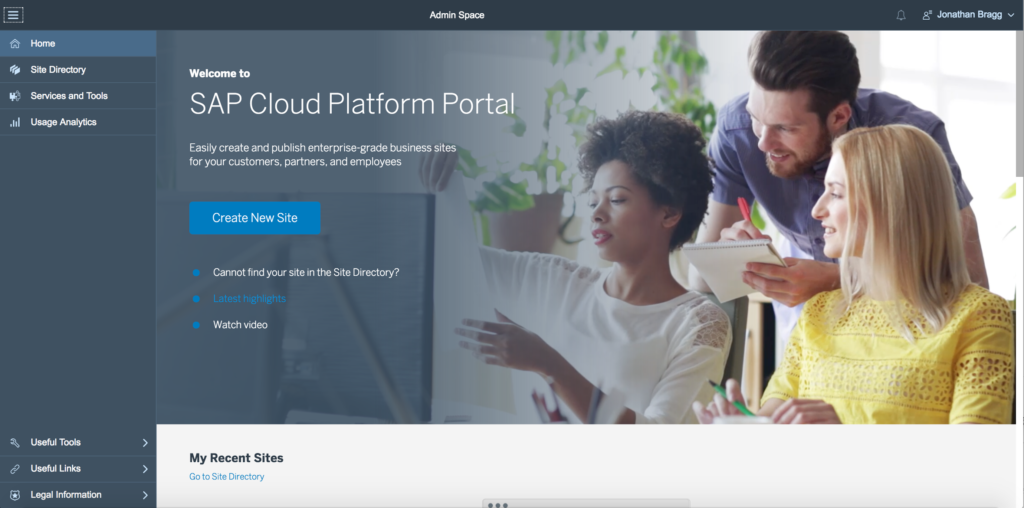
This is the SAP SCP Portal service home page. From here you can go to your site directory, create a new site, look at other available tools such as the theme editor, and look at portal site usage analytics. Each of these features are much easier to use then trying to get to them in the on-premise FLP Designer.
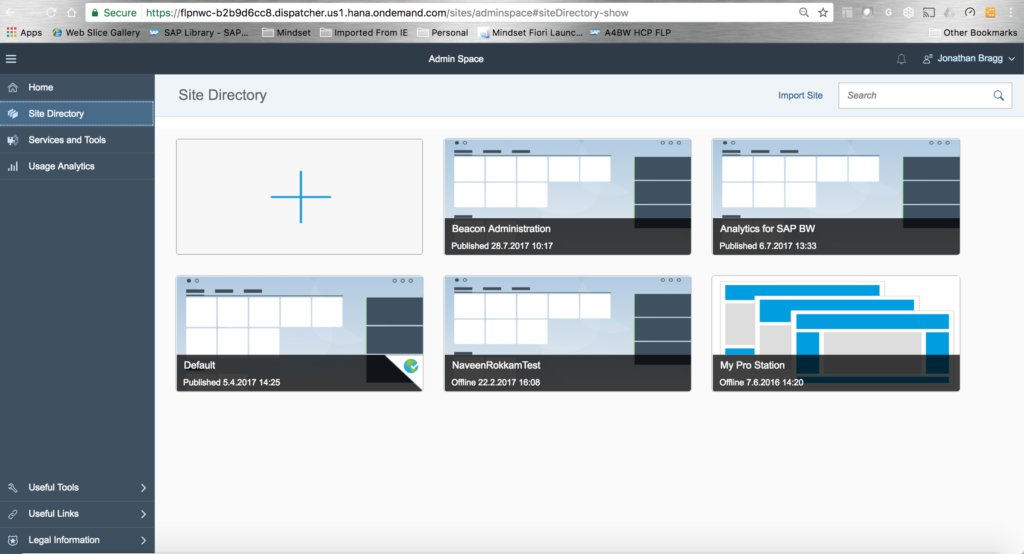
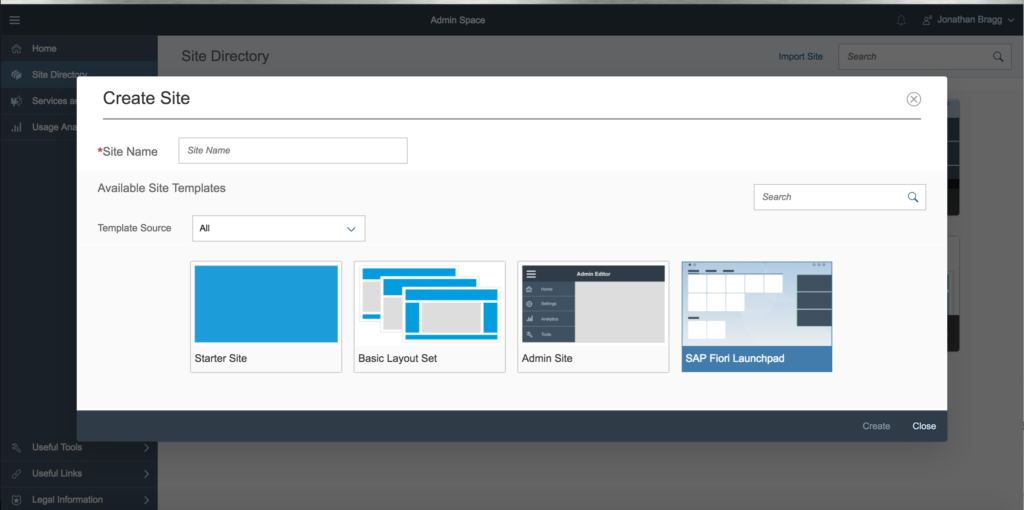
Click on Site directory from the left hand menu and you’ll see any other portal sites you’ve already created and also a tile with a “+” button where you can create another portal site. Click on the “+” tile.
A popup appears asking you for a site name and what kind of template you want to use. For this blog, we’ll use the SAP Fiori Launchpad, but as you can see there are other site templates if you wish to build something other than a FLP in the cloud.
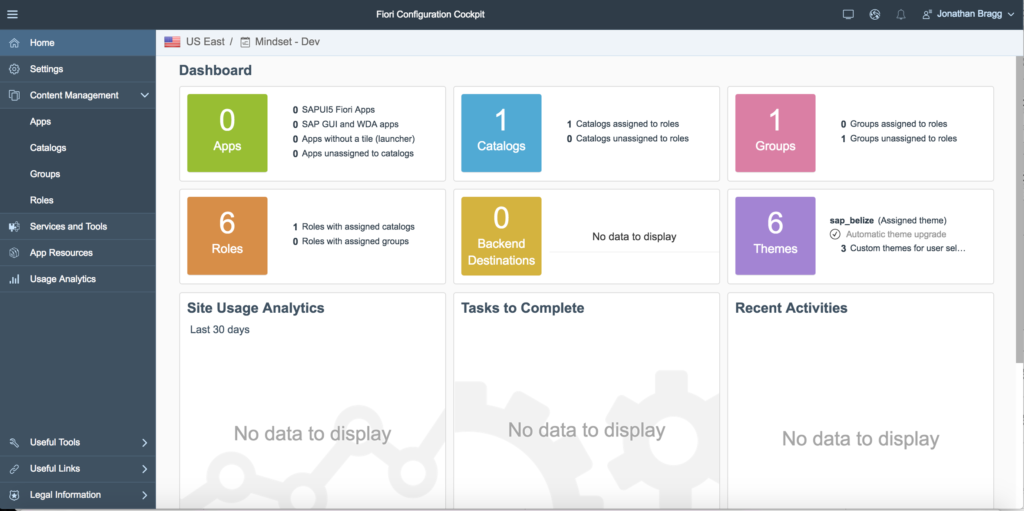
Once you click create, you are taken to the Fiori configuration cockpit. Here you can see a dashboard of what’s in your Portal FLP page as well as links on the left to get started creating content. Apps, Catalogs, Groups, and Roles is what we’ll be creating and adding to the FLP today.
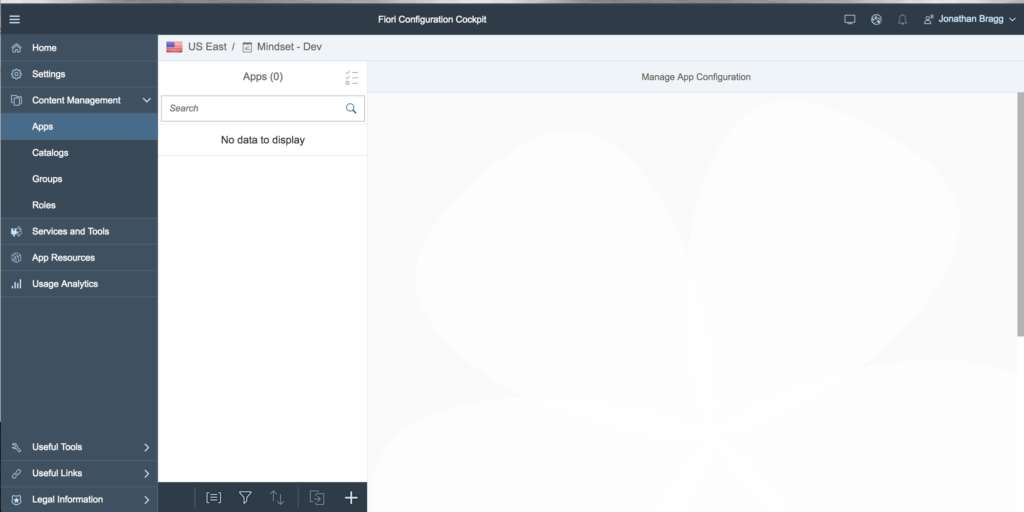
Click the Apps link on the left hand side of the screen. You’ll see a master/detail screen that will allow you to add in Fiori applications. Click on the “+” button to add a new application.
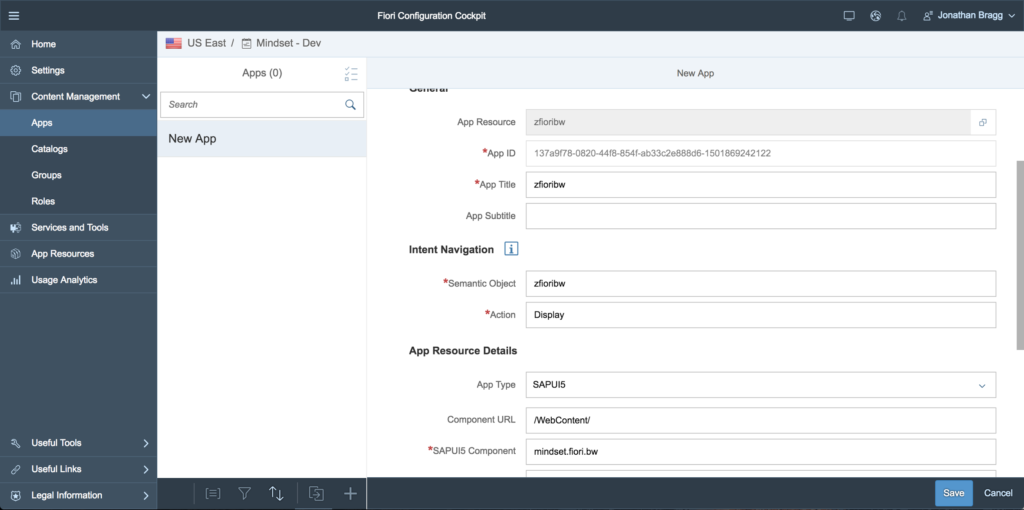
After clicking on the “+” button, you will see a tabstrip that guides you through creating/adding a new application into the portal site. Click on the App Resource search help box and you’ll see a list of available applications you have hosted in your SAP Cloud Platform. For this blog, I am picking our Fiori BW application.
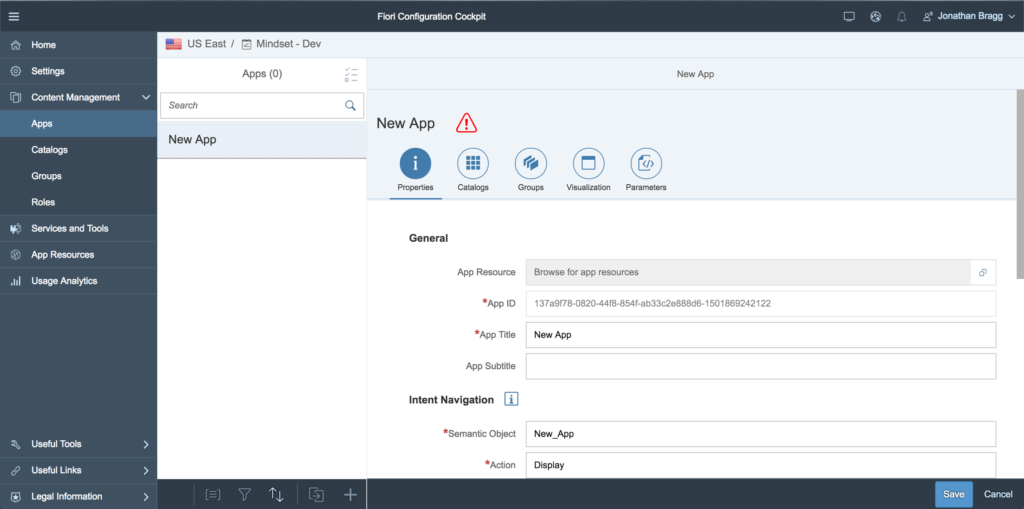
As soon as you add the App Resource into the portal page application the App ID, App Title, Intent Navigation, and App details are filled out automatically. You can change the names/titles here if you want.
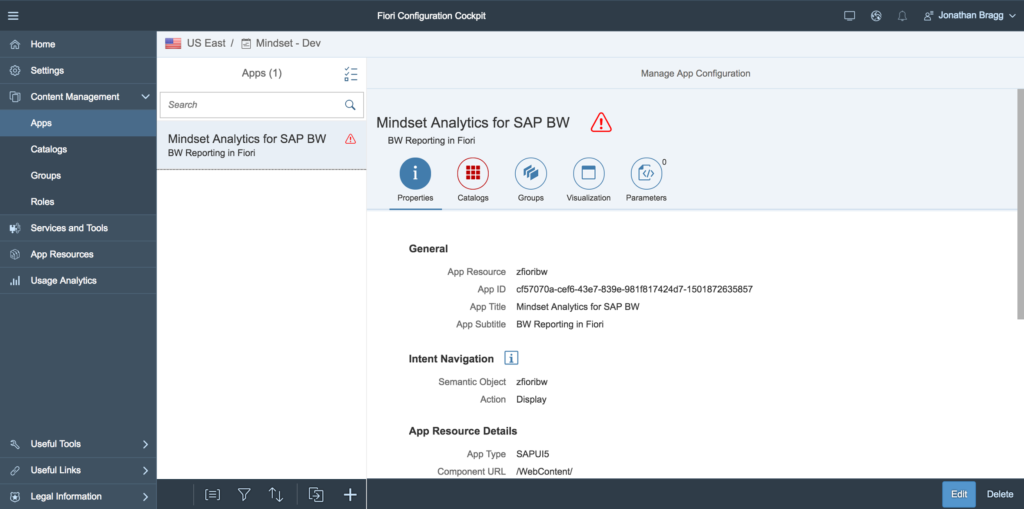
When saving the application after filling out the properties page, you see the Catalog tab change to red and also a red warning symbol appear. This is because we have not assigned a catalog for this application to be a part of. Prior to assigning the catalog, we have to create a new catalog.
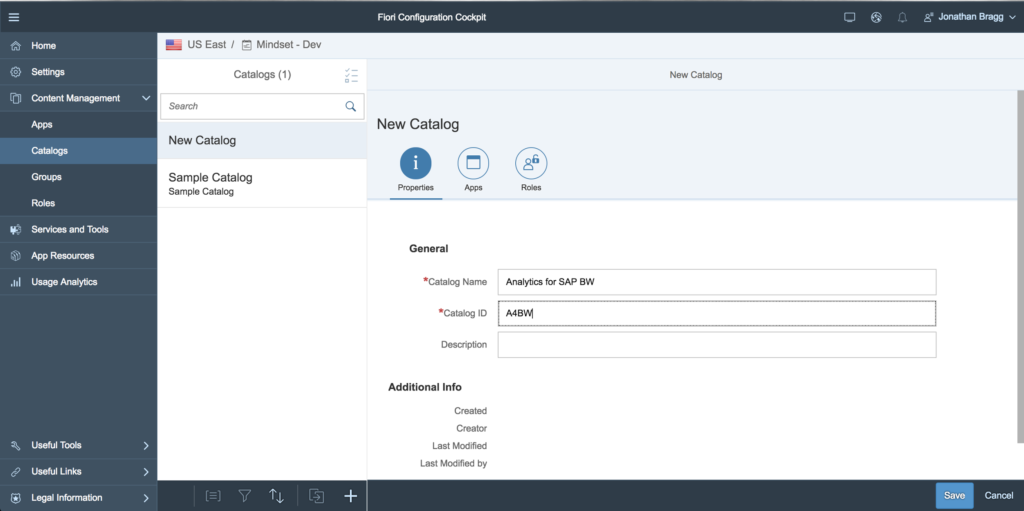
To create a new catalog, click on the Catalogs link on the left navigation pane. From here, the master/detail screen will look very similar to the Apps master/detail screen. Click the “+” button to create a new catalog and fill in the name and ID.
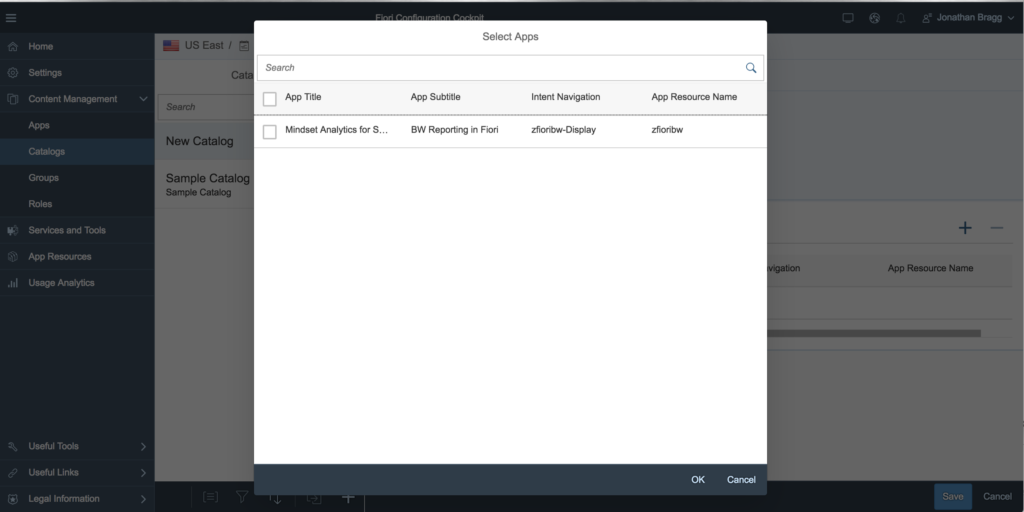
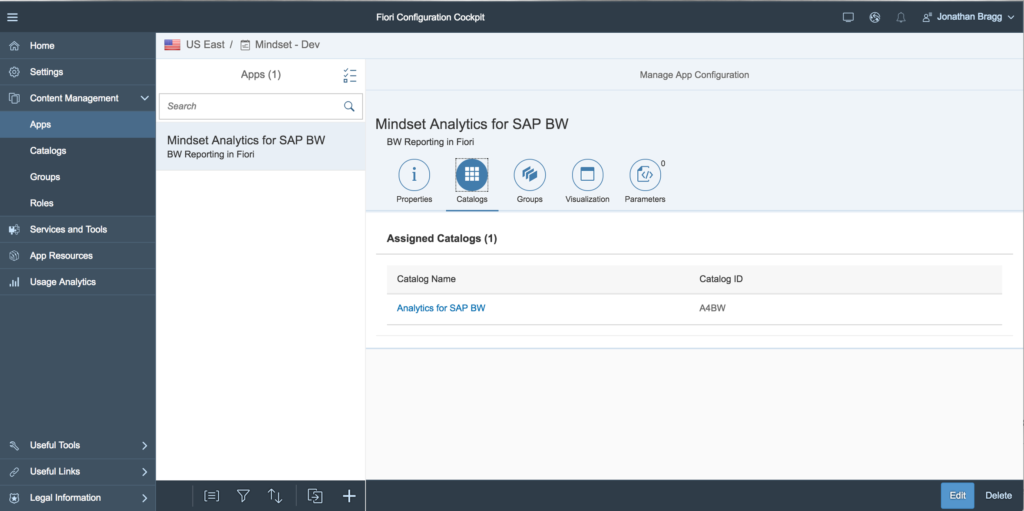
Click on the Apps tab. Here you will add an app into the catalog. The apps you have to choose from are the apps you have added to the portal site. So far, we only have one to choose from. Select it here and click ok. This will add our Analytics for SAP BW application into the catalog.
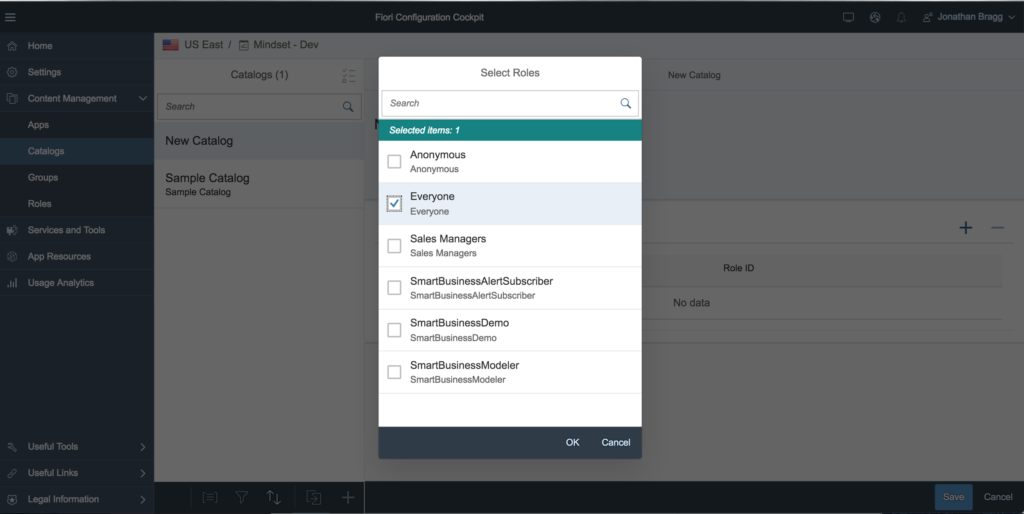
Click on the roles tab. Here we can add permissions to our catalog. Click on the “+” button and assign the Everyone role to this catalog. You can create a specific role by going to the roles link in the left hand navigation pane, but for the purposes of testing applications I first assign everything to the Everyone role.
After saving the Catalog, we can go back to our created app and see the red catalog icon has gone away now that it has been created and assigned.
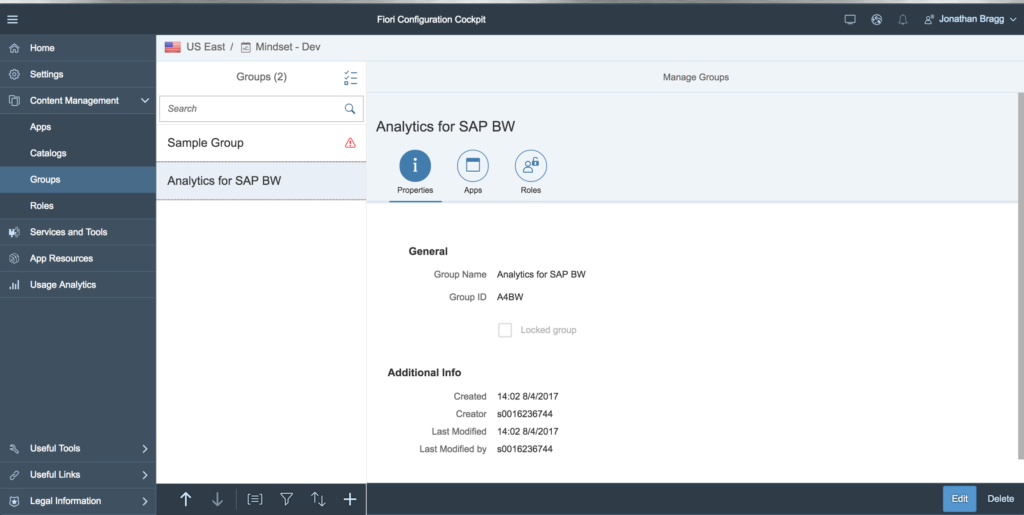
Now that we have 1 app, and a catalog, we can create a group the same way we have with the app and role . Once we have a group created and assigned to the app and role we can finally take a quick look at our new launchpad!
Now that the group is created, saved, and assigned we can now preview our FLP in the Cloud. To do this, click in the upper right hand corner of the screen to the left of your name. You’ll see a computer screen icon which is the preview button. To the right of that is a globe icon that we can save and publish the site with.

Now that your launchpad has been started, you can fill it with additional applications, publish the site, checkout usage analytics, and more! If you have any questions on additional SCP FLP configuration, are looking for custom apps, or need help with your Fiori installation or integration, contact us here!
View our LinkedIn, here.