
As a continuation of my last blog where I showed you how to setup your Fiori Launchpad by using the SAP Cloud Platform portal service, I wanted to also show you how to start branding your launchpad with the UI Theme Designer in the cloud.
Follow these initial steps to be on your way to a branded/themed Launchpad in the cloud.
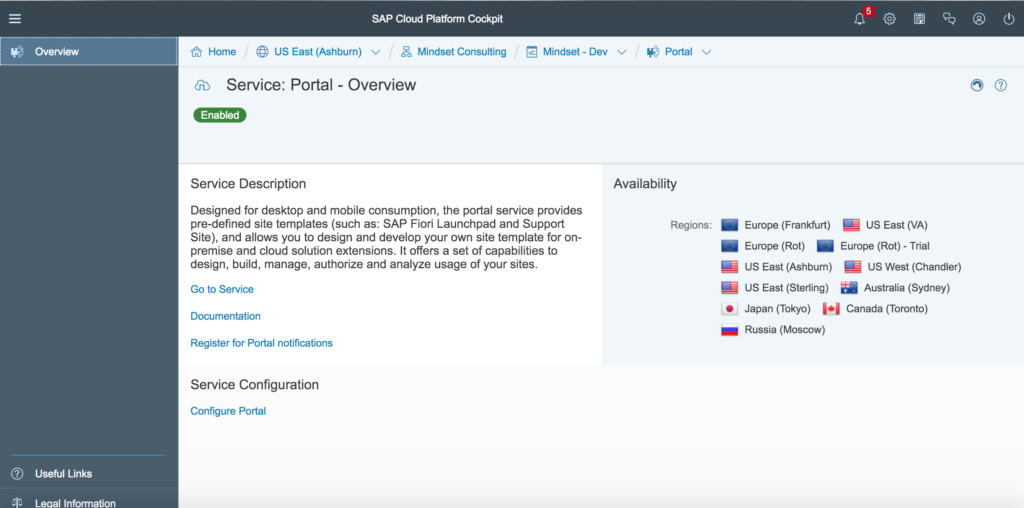
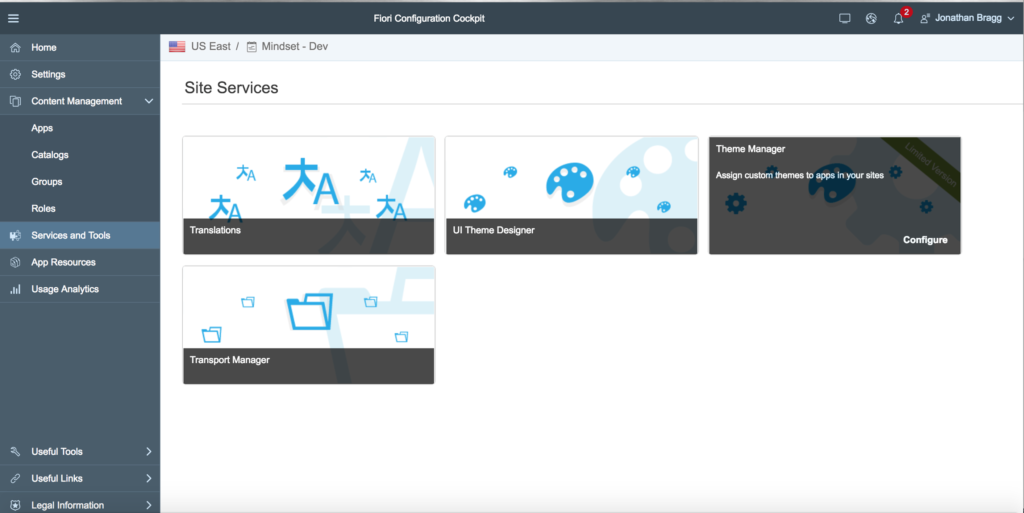
Step 1. Logon to your SAP Cloud Platform site and navigate to the Portal Service
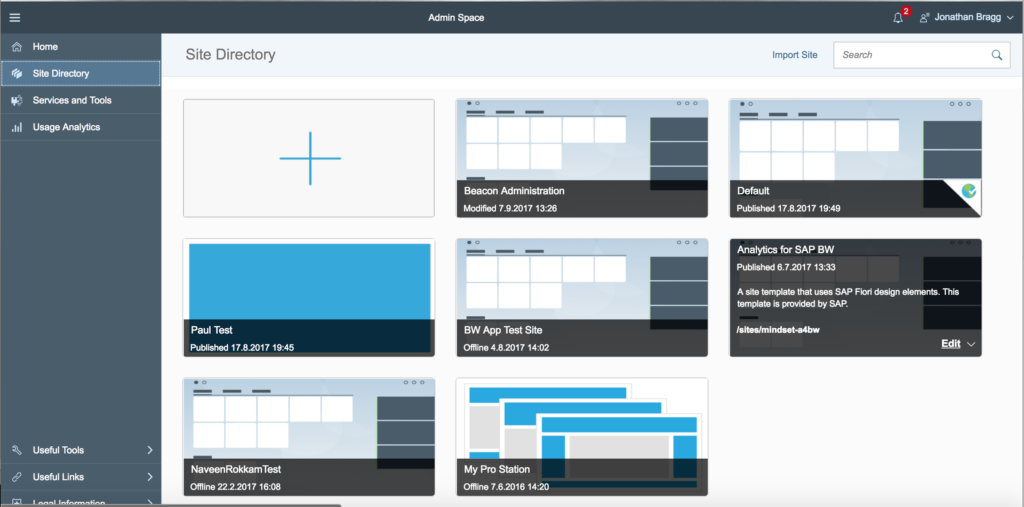
Step 2. Go to the Portal Service, click on Site Directory, and click the edit button on your created Launchpad page.
Step 3. Click on Services and Tools. Here you will see both the UI Theme Designer and the Theme Manager tools as a part of your Launchpad site. Click on the UI Theme Designer icon to open a new page displaying the UI Theme Designer specific to your Portal Launchpad site page.

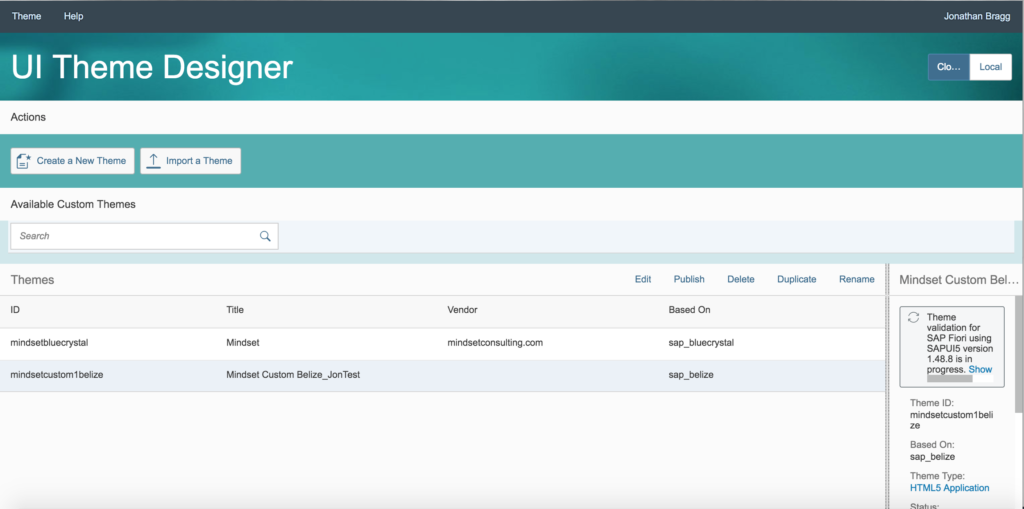
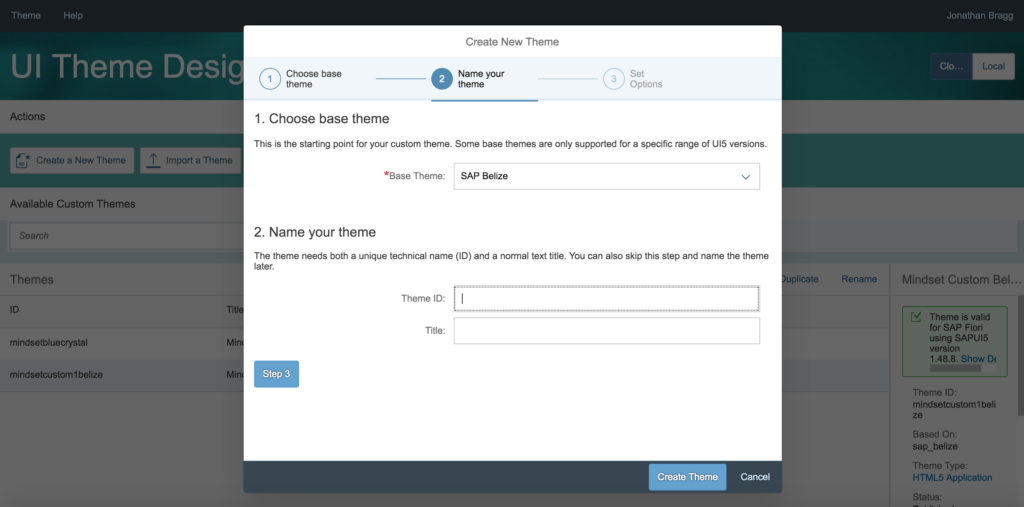
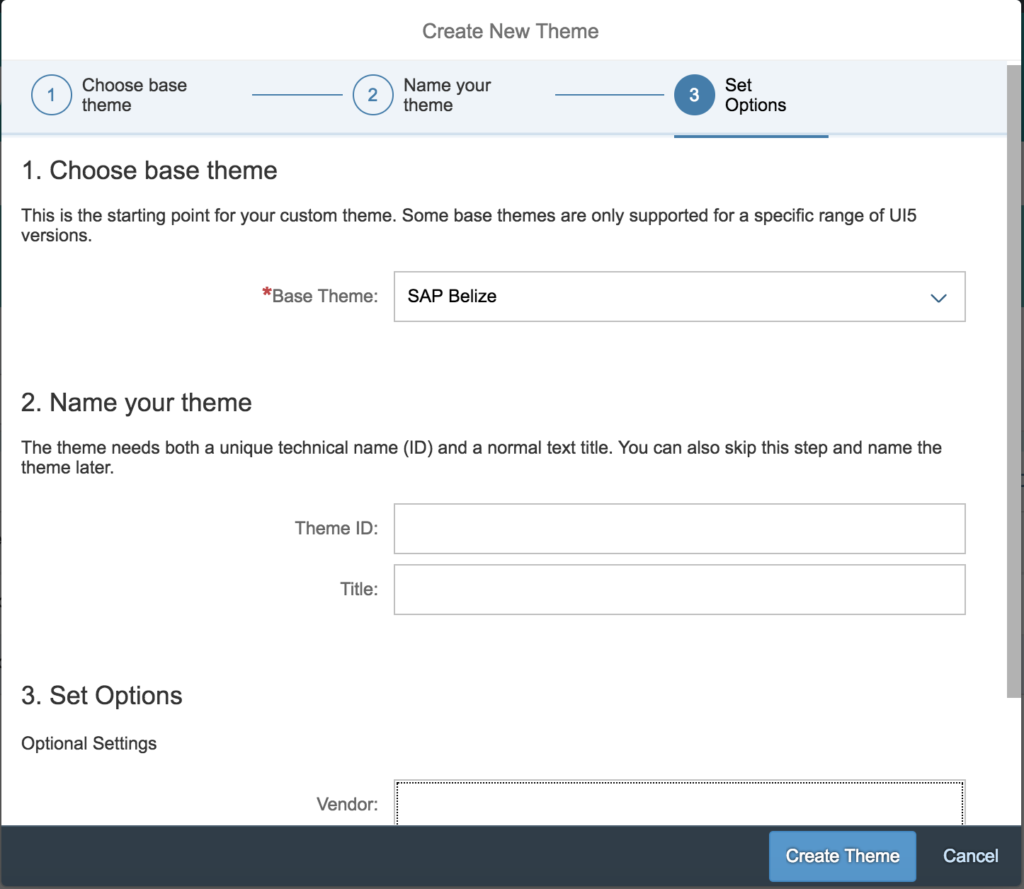
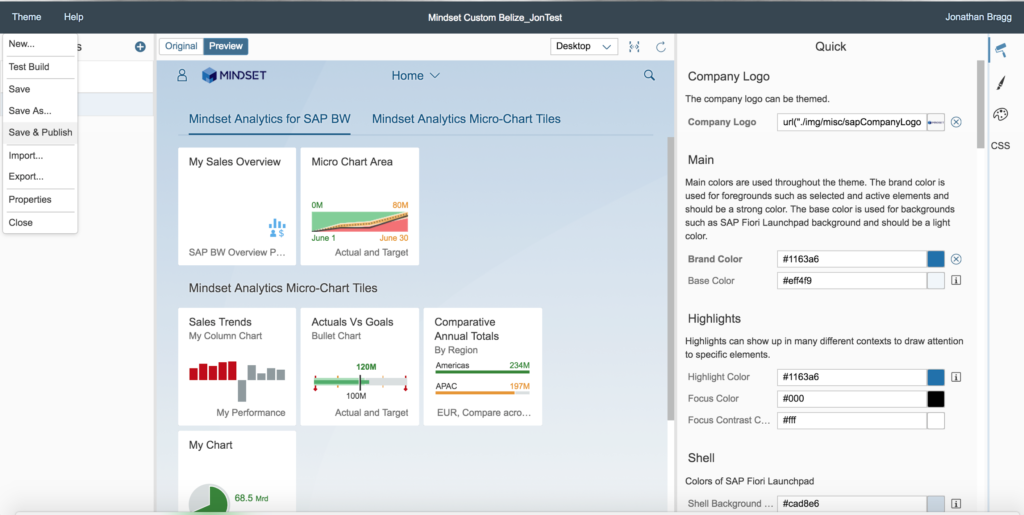
Step 4. Create a new theme or select one from the list. (I’ll be editing my original copy of the belize theme for this blog, but will show you the creation steps).
Click on Create a New Theme and follow the wizard steps to create a new theme as a copy of one of SAP’s standard themes as a starting point. 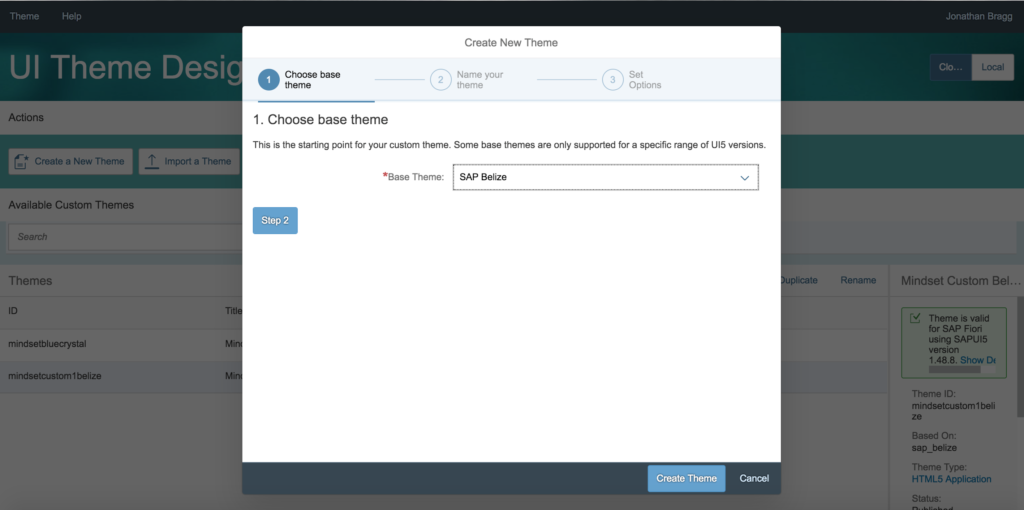
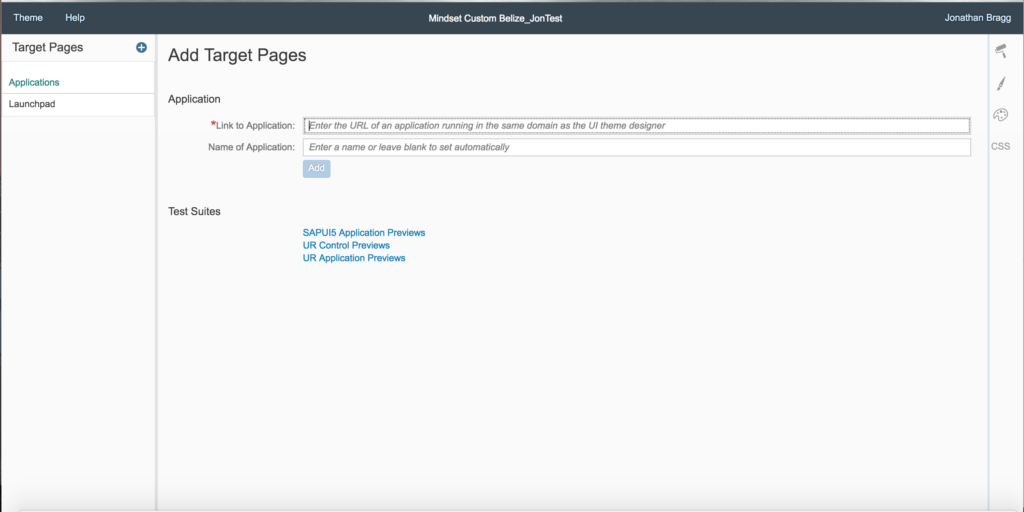
Step 5. Once you have named and created your new theme you are taken to a screen to add target pages for theming. For this, I use our Portal Launchpad URL. You can get this by going back to the Portal Service Launchpad page we opened earlier and launching your portal launchpad. Once it opens, copy the URL and paste it into the Target Pages’ Link to Application field. I also gave it a Name of Launchpad in case we add more specific targets in the future.
Step 6. Once you click the add button, you are taken to the Launchpad target page in the theme editor. This is now where you can start to change the base theme you’ve chosen and make it your own!
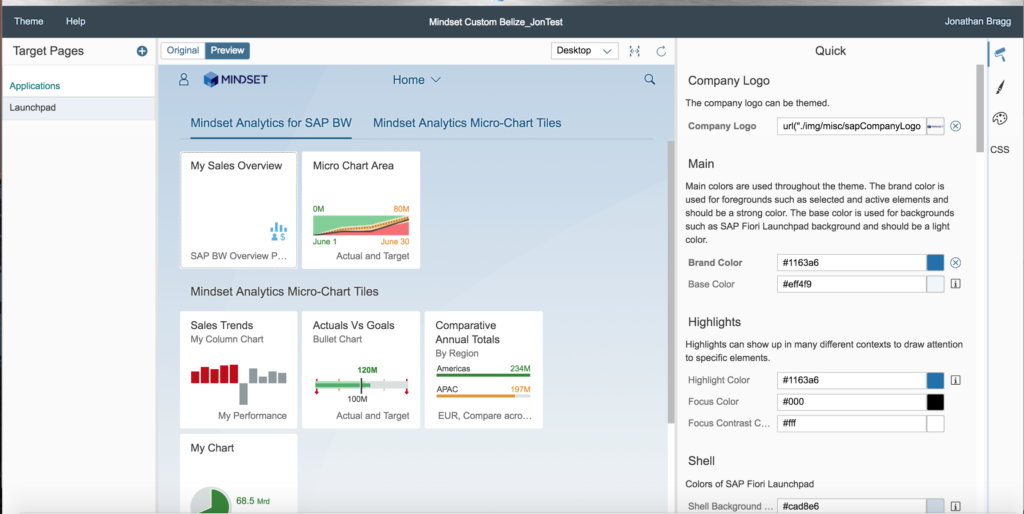
The center of the page is your preview window where you can see all of your changes live in your launchpad page before you deploy the theme.
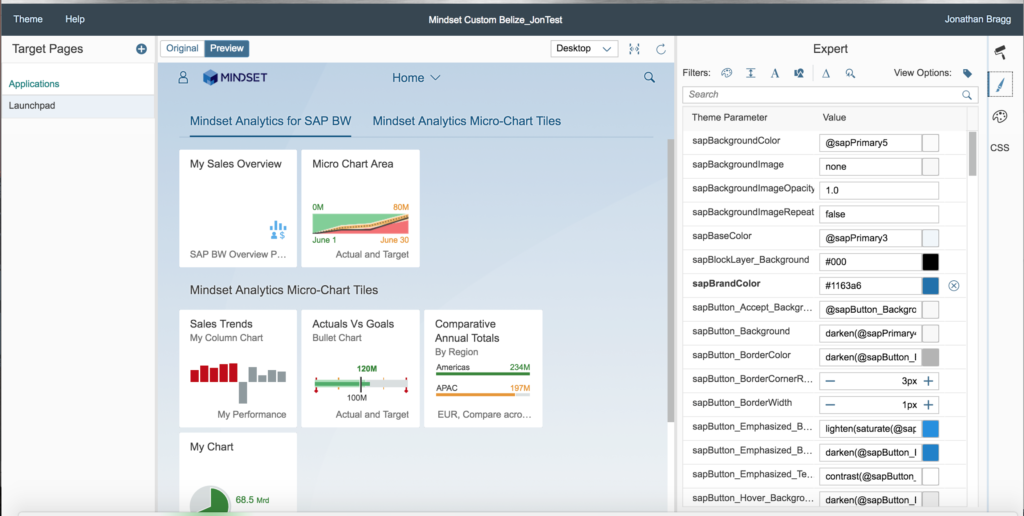
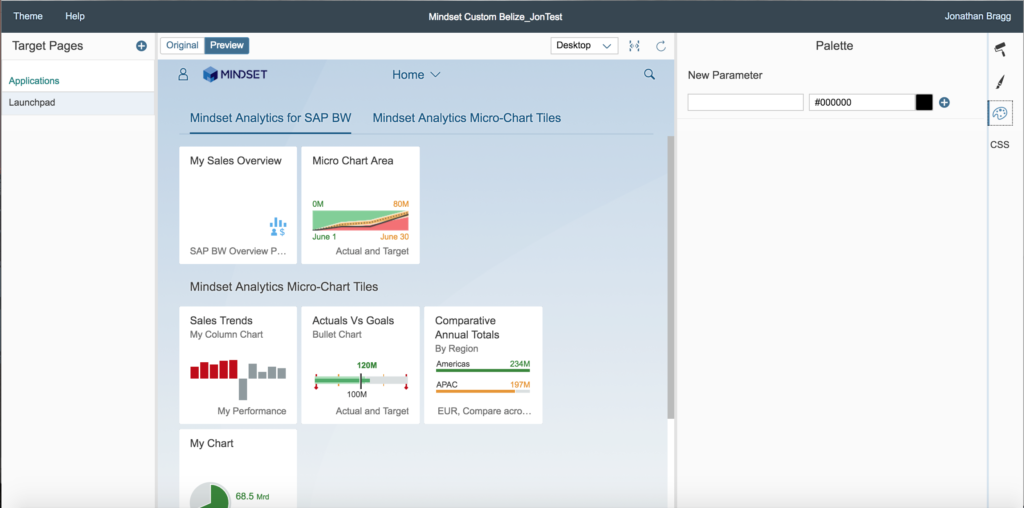
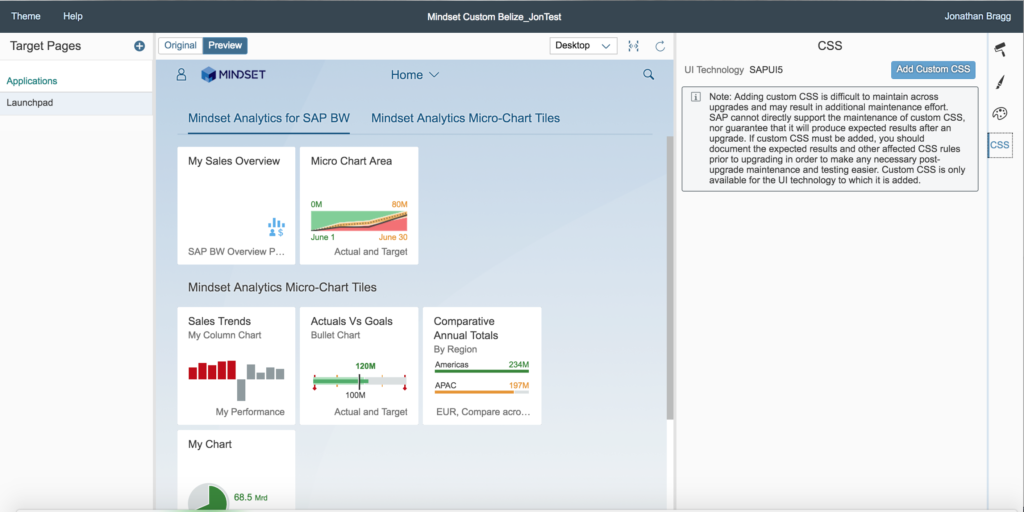
The right hand side of the page are all of the elements you can possibly change. The first “paint roller” icon area are the simplest changes. Things like company logos, brand theme colors, highlights, tile colors, group texts, etc…etc… This area is a good place to start to get familiar with what changes when you select different options or colors or texts. As you click from the paint roller icon on the right to the paintbrush, paint tray, and CSS the options get increasingly more complicated as you get more advanced in your theming and/or if you want to add custom CSS to your apps. (See screenshots below for a sample of each of these areas).
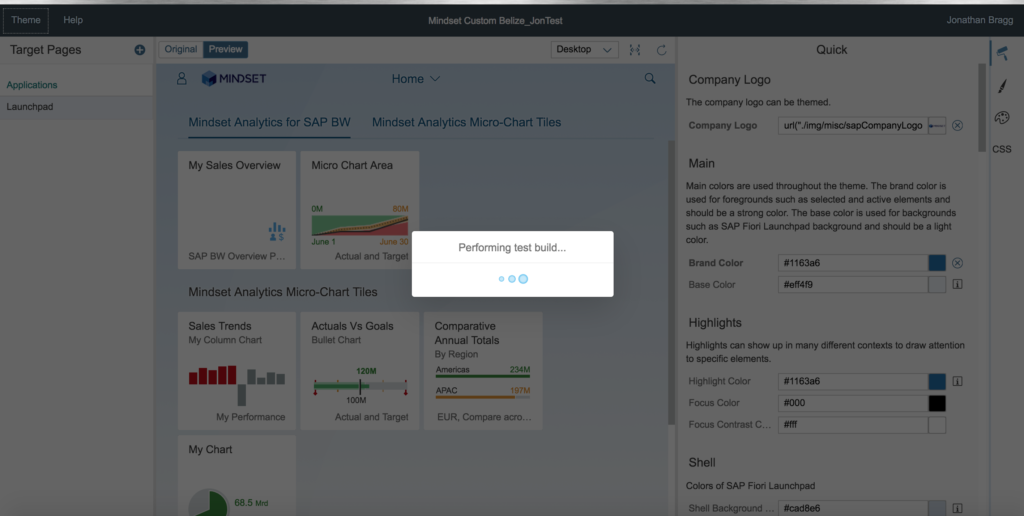
Step 7. Once you are happy with your launchpad changes you need to deploy your new theme. Before saving and publishing your new theme, you want to test it for any errors. To do this, click the Theme heading in the top left of the page. In the menu, click on test build. A status message will appear as it goes through the testing process. Once done, there will be a message saying the test was successful.
Step 8. Save and Publish your theme. After the test is successful, go to the same Theme menu and click Save and Publish.

Step 9. After the theme saves, you can go back to your portal site page and select the UI theme manager icon.
Step 10. Assign the theme to your site. Once in the theme manager, you should see your new theme in the list of available themes. This should’ve happened from your save and publish in the Theme Editor. (If you do not see your theme in the list, please follow the steps to export and import your theme to your page).
In the theme manager you can select whether you want to set this theme as a default for the site with the “Assign to Site” button or you can also let users select this theme on their own with the “Enable User Selection” button.

Troubleshooting: My theme didn’t show up in the Theme Manager?
If you don’t see your Theme in the Theme Manager list after publishing, you will have to manually export your theme and import it as a new theme into the Theme Manager.
Step 1: Select Export from the Theme menu
Step 2. Select the options and name for the theme export. You should only need to select Source Files + CSS Resources for the export.

Step 3. After the export is complete, you can import the zip file into the theme manager by clicking on the + button and Browsing for your theme zip file on your computer. Once you select Save, the theme imports into the Theme Manager. This upload usually takes a while (Between 5-10 minutes I’ve seen previously).

Creating your corporate brand/theme for Fiori is a very important step in an SAP Launchpad setup, but often overlooked. Let us know how you do in the comments below! Happy theming!
View our LinkedIn, here.
