For those of you who don’t know me, I’m not much of a true code warrior. Sure I can look at the code, walk through it, troubleshoot it, change it, deploy it, test it, etc…but if you ask me to write an end-to-end ABAP program from scratch you’ll most likely be very disappointed in what you get! 🙂
In this guide, I’m going to walk through step by step, my trial of the SAP Cloud Platform SDK for iOS from a non-developer’s perspective. Hopefully, this can show exactly how easy or hard the SDK is to use out of the box from SAP. Keep in mind that up until this blog, I have not developed anything within XCode/Swift and/or opened the SDK. This post will cover the download, installation, and configuration of the SDK to start building a new app from scratch. Ready? Let’s see what we can do!
Downloading, installing, and configuring the SDK.
For this tutorial, I was provided with 2 zip files. One containing the SDK, and another containing patch. By the time this is generally available I assume there will only be 1 download file needed. After extracting the zip files and installing to my mac I am left with the new folders below in my SAP Cloud Platform SDK for iOS directory. These are Assistant, Documentation, Frameworks, and Tools.

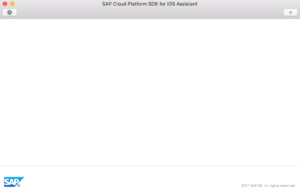
The Assistant folder is where the new SAP SDK application lies. Click and open the assistant program. When opening for the first time, the assistant application looks like the screenshot below. Very blank. Let’s try the “+” button to add a project.
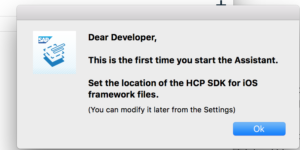
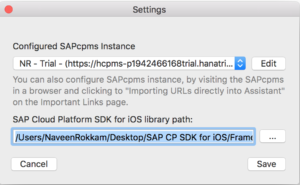
After clicking the “+” button I am prompted to enter the HCP SDK iOS library path. (Sidenote: How nice of it to call me a developer, but proper grammar would be nice.)
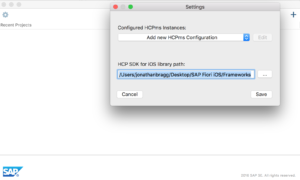
To set this, click ok and point this to the frameworks folder available after extracting the .zip file. I can check this location in the settings dialog.
Now, when I click the “+” button to start a new project I am taken to a wizard to start a new Xcode related project. This wizard/assistant is what makes up most of the end user view of the new SDK.
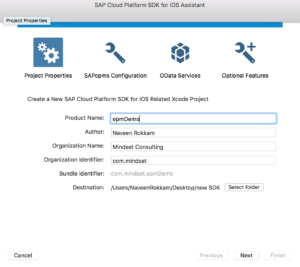
On the properties screen, you can fill in details about the application you are about to create.
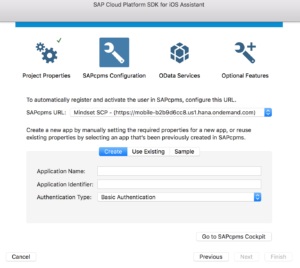
Clicking “Next” takes me to the HCPms Configuration screen.
To create our application, we’ll need to add our HCPms configuration. Click on “Add new HCPms Configuration”

In order to add a new HCPms configuration, I need to login to my SAP Cloud Platform account to retrieve my specific HCPms Admin URL’s.
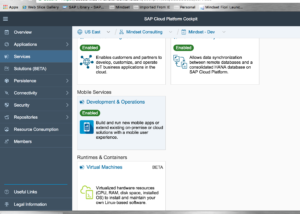
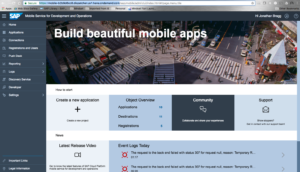
After logging into my SAP Cloud Platform account, I now need to navigate to Services → Mobile Services → Development & Operations.
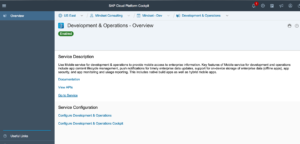
Once you are in the Development and Operations service, click on “Go to Service”. The mobiles services page will launch. The page that loads give us the URL of what we need to enter into the Assistant. See below the URL string needed.
Now that we have our HCPms Admin API URL copied and pasted from the SAP Cloud Platform site, the assistant automatically copies it down to the UI URL. Now I need to provide my S-User login credentials for the SAP Cloud Platform and save this new configuration.
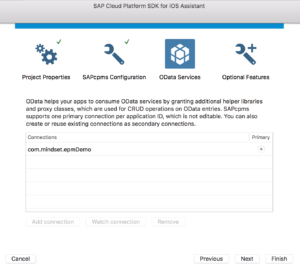
My new configuration is now saved and I can click the “Next” button to move on to the OData Services step.
In the OData service screen, we’re going to have to add a new connection to an OData service. To start this, click on “Add Connection”.
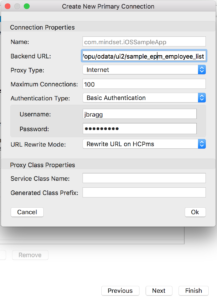
The New Primary Connection box shows up. We’ll need to provide a Backend URL to the OData service we want to use for this app. Since our internal gateway system is available via the external internet I’m going to choose the Internet proxy type. The other selection is on-premise which would also work in this scenario.
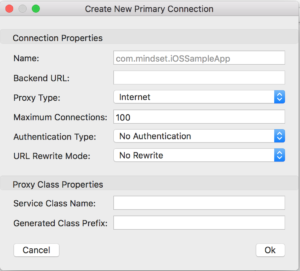
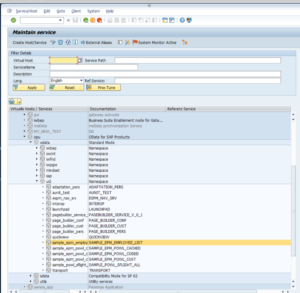
To find the service I want to use, I log into our gateway system and look in code SICF for available services under opu/odata/ui2. I have chosen the Sample Employee List service for this app. When I right click on this service and select test service, it gives me the full URL needed for the oData configuration in the assistant.
In the configuration window, I have pasted my URL I got from the gateway system and also chosen basic authentication with my gateway user credentials provided. This should be all we need for the connection details!
Clicking “Ok” brings us back to the assistant screen where we can now click Next of Finish. I’ll click “Next” to see what other options we have.
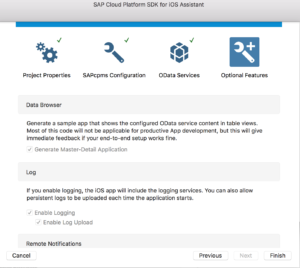
The Optional Features page allows you to select whether the assistant should generate a Master Detail Application for you to view the data. (Sorry, it says it will create an application already connected to my oData service automatically…umm Yes Please!)
The other options of Logging and Remote Notifications are pre-selected and sound like good things to have in the Xcode project pre-built for you. Once this gets generated into an Xcode project, we’ll always have the option of changing/deleting/creating other things. This is just a starting point.
There you have it. That was a relatively painless SDK wizard to get you through setting up an SAP Cloud Platform SDK for an iOS project saved in SAP Cloud Platform and ready to develop in Xcode. Once you click finish, your project will be created and the Xcode project will be generated and opened. Stay tuned to the next blog in this series coming soon showing the project in Xcode and viewing what our app looks like with no coding involved!
And to see a techie’s perspective, check out Naveen Rokkam’s blog series, here.
View our LinkedIn, here.