React is a javascript library for building user interfaces. It is a framework where we can build websites for mobile devices and desktops, and also we can build applications. React.js allows us to create reusable and reactive components consisting of HTML and JavaScript (and CSS).
In this blog, I will cover React, JSX, and Components, with the setup and demonstration of the steps required to create a new react project using a Visual Studio Code editor.
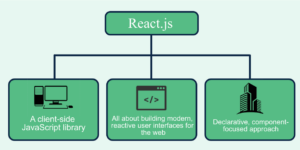
JSX stands for JavaScript XML. It enables us to use HTML, which is easier in React. We write the HTML code inside JavaScript, which renders the necessary elements. In addition to JSX, we also create Components, a reusable part of code that works like JavaScript functions.
To pass data from one component to another, properties (props) are used to give the data-like arguments. This is useful when the flow of data should be dynamic.
For building a web application using React, we can use any code editor like Visual Studio Code (VS Code), Sublime Text, WebStorm, etc.
Consider an example of a website or an application built in React. This application is highly interactive and runs smoothly when we work with it. It’s easy to use and we don’t have to wait for anything to load where. We have a nice transition. This is achieved because only the necessary components are loaded into the application and it allows the utilization of individual parts of the application on both the client and server sides.
- Creating a React Application
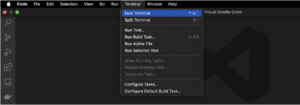
To create React apps, we need a code editor. In this instance, we will use Visual Studio Code. VS Code is a free code editor and IDE which supports many languages, extensions, and plugins. It’s a great tool with features including GitHub integration, integration for testing code, and a built-in debugger. It also allows for a wide range of customization options with less memory usage.
In addition to VS code, we also need Node.js installed, a runtime for JavaScript. Let’s now look at how this can be done.
-
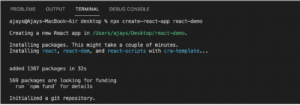
- Open VS code and go to the “Terminal” tab, click on “New Terminal” and type – $npx create-react-app folder_name
Here the folder_name can be of your choice; for example, $npx create-react-app react-demo
- Running the React Application
A folder will be created on your desktop, depending on the file_name you made.
-
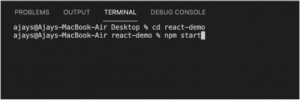
- Once the folder is created, type cd folder_name, for example, $cd react-demo, to navigate to the folder created for the project.
-
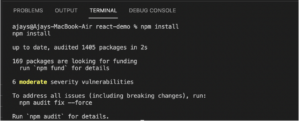
- Type $npm install in the terminal, which downloads and installs the necessary packages and dependencies.
- Then type $npm to start running the app, which automatically opens the browser and runs in localhost.
-
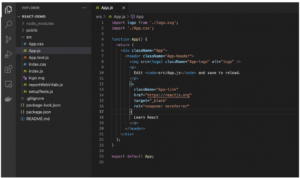
- This is the default code that is pre-defined when the project is created, showing the below output.

-
- Modify the App.js file to see the required output. The subsequent statement always returns one element. Hence it should be wrapped in a single piece.
- Build and Deploy
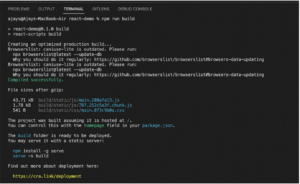
Once the development is complete, we should build the project using the $npm run build command, which creates a build directory of the app. For deployment of the app, we can use the Apache Tomcat Server, Firebase, etc., with our configurations. The deployment process, however, differs based on the server you choose.
By following the steps above, you will now be able to create and build your React.js application with reactive user interfaces for the web, where you can design simple layouts and render the suitable component when the data changes.
View our LinkedIn here.